Spring Sprouts
This activity comes to us from the educators at Prospect Park’s Lefferts Historic House. Check out the Lefferts at Home page for more.
As the weather warms and the sun shines longer in the day, our minds turn to what is happening in the garden. At Lefferts, spring is the time of year to remove the cover crops that return nutrients to the soil during the dormant season, and till or turn the soil to loosen it up after a winter of it compacting from snow, rain and freezing temperatures. The first crop we traditionally plant at Lefferts, flax (for creating linen cloth) can be sown or thrown directly into the field as soon as the ground thaws. For some of our favorite veggies both at home and at Lefferts, early spring temperatures are still a little too cold to plant directly outdoors and must be started or germinated indoors to protect the tender seedling.
In this activity, we will introduce you to several methods of making seed starters. These tiny pots are the perfect size for getting seeds germinated and most importantly they are all made of compostable materials so once your seeds have sprouted and the weather warms you can plant the whole thing, starter pot and all right in the ground or larger pot where it can grow to
maturity.
Find a glossary of bolded words after the instructions for additional information!
Activity: Making seed starters out of toilet paper tubes, eggshells, egg cartons, and paper
Instructions for paper tube seed starters
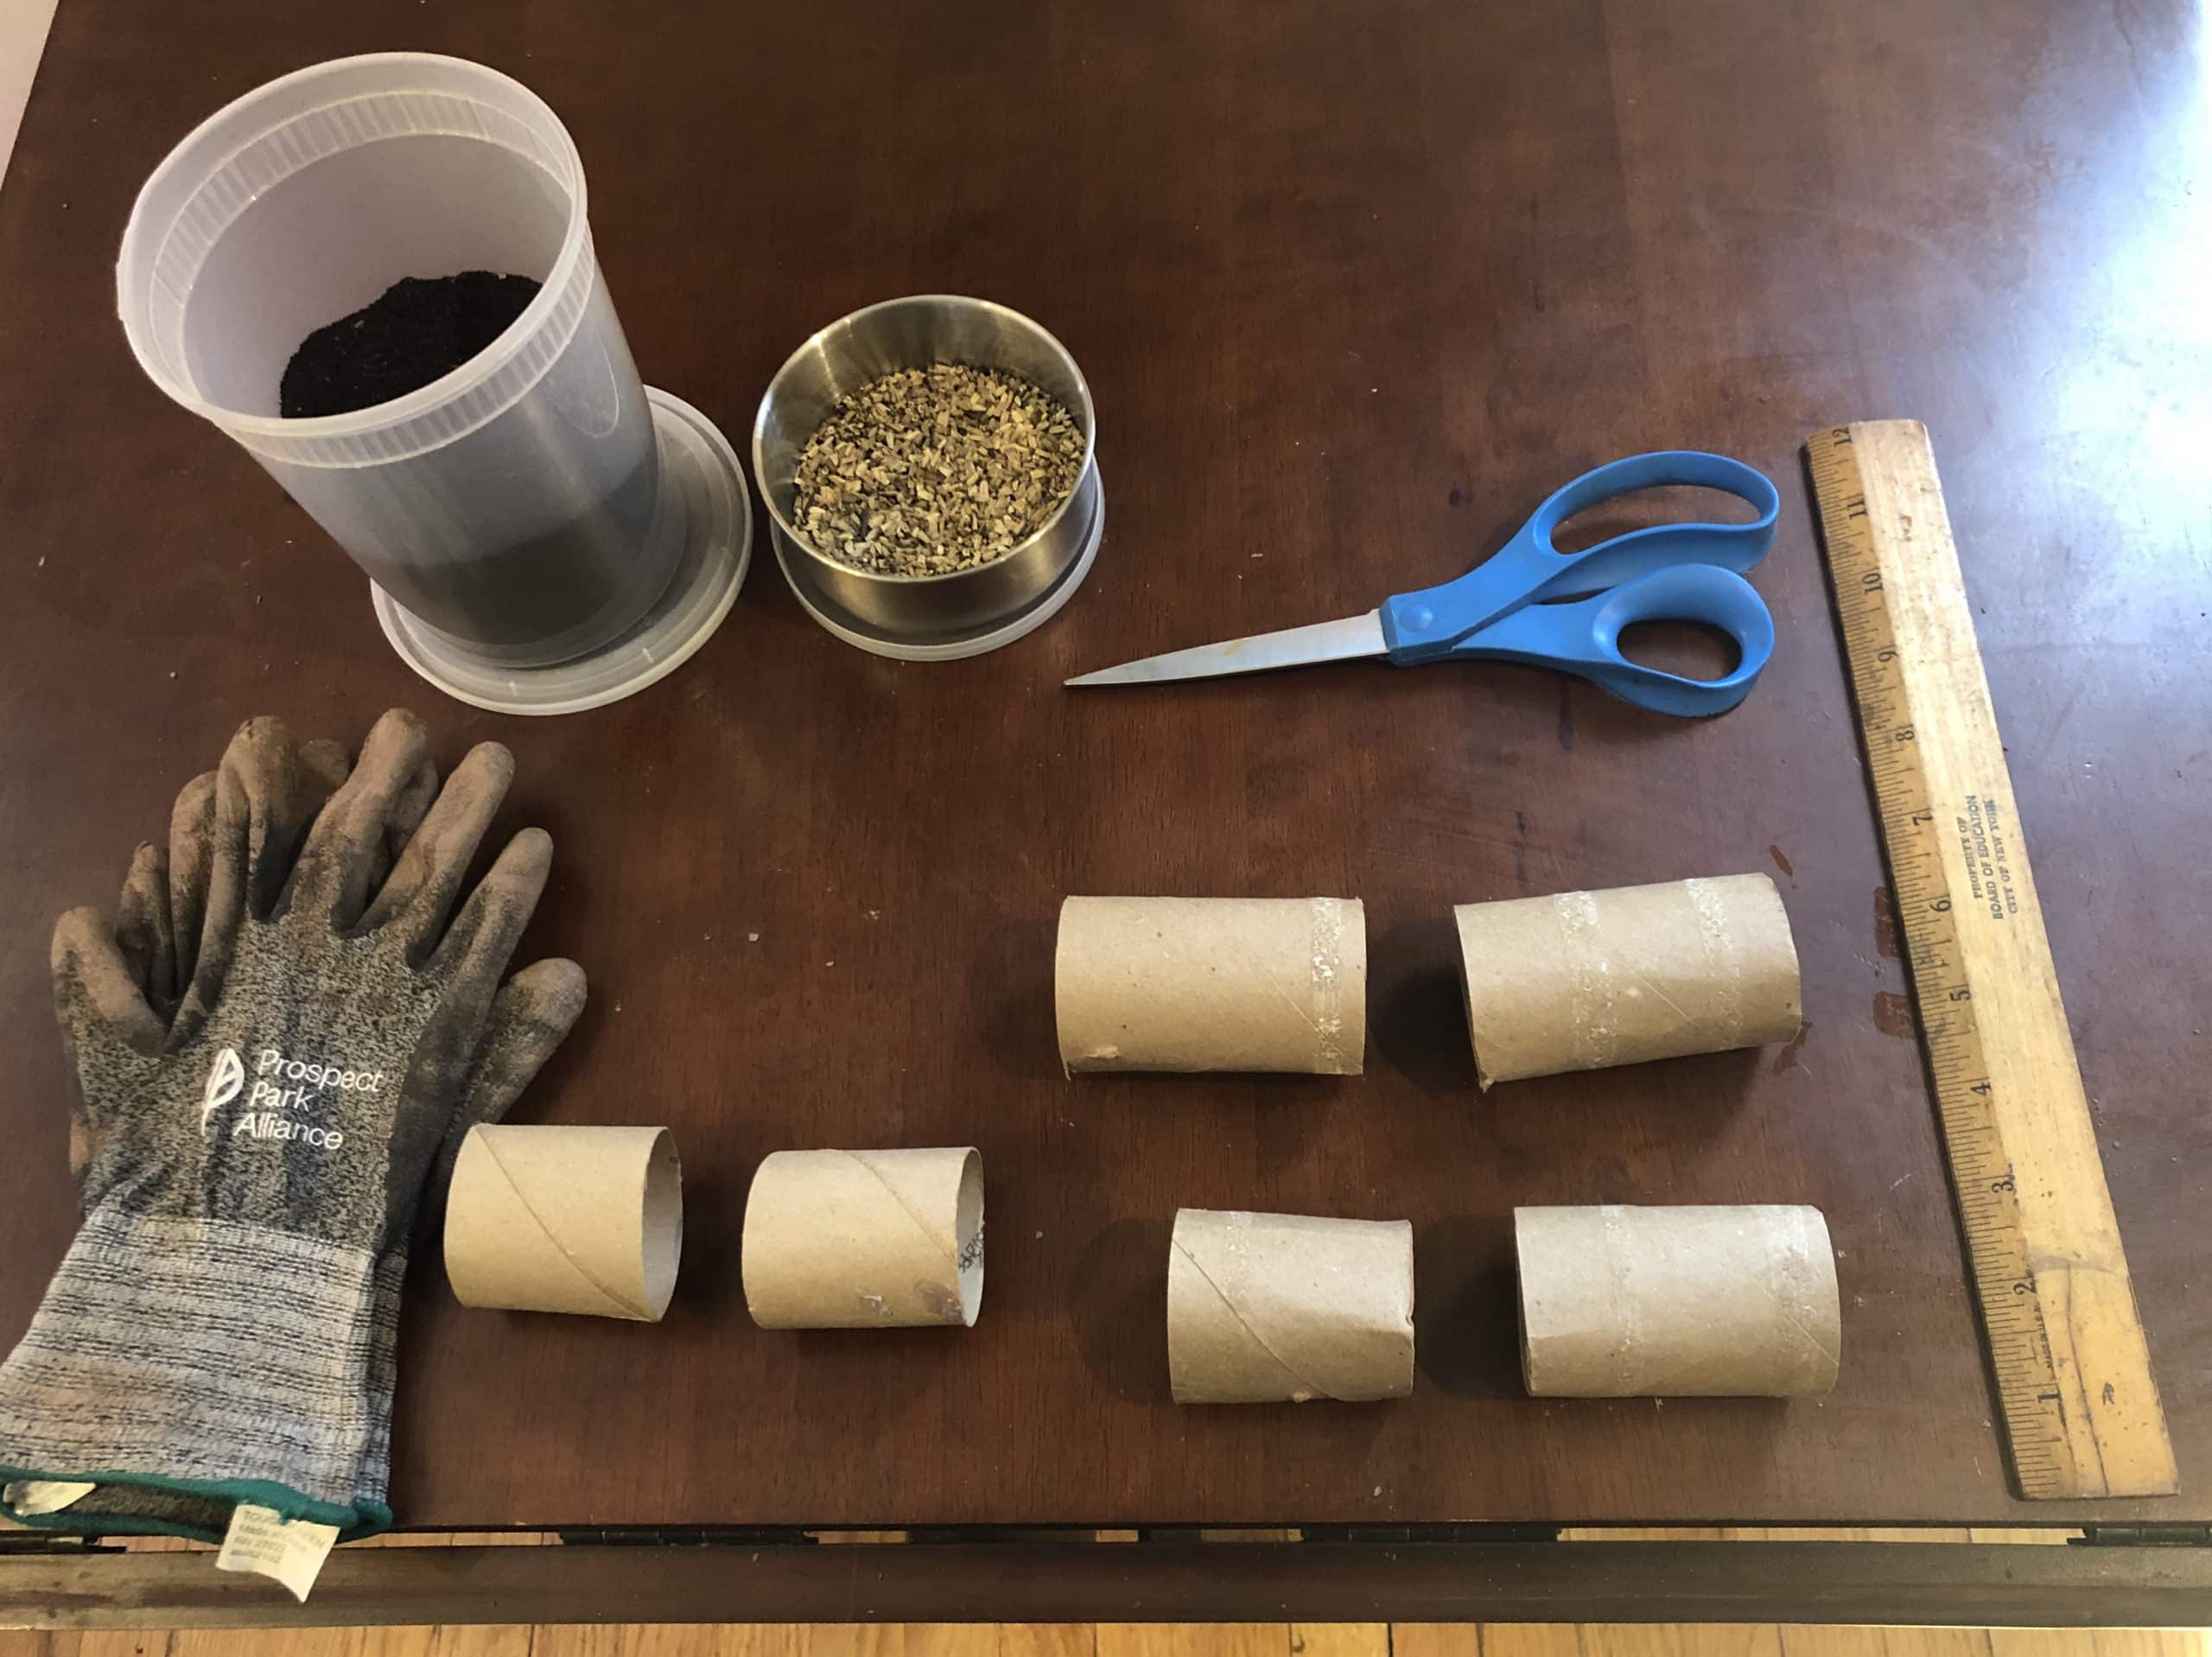
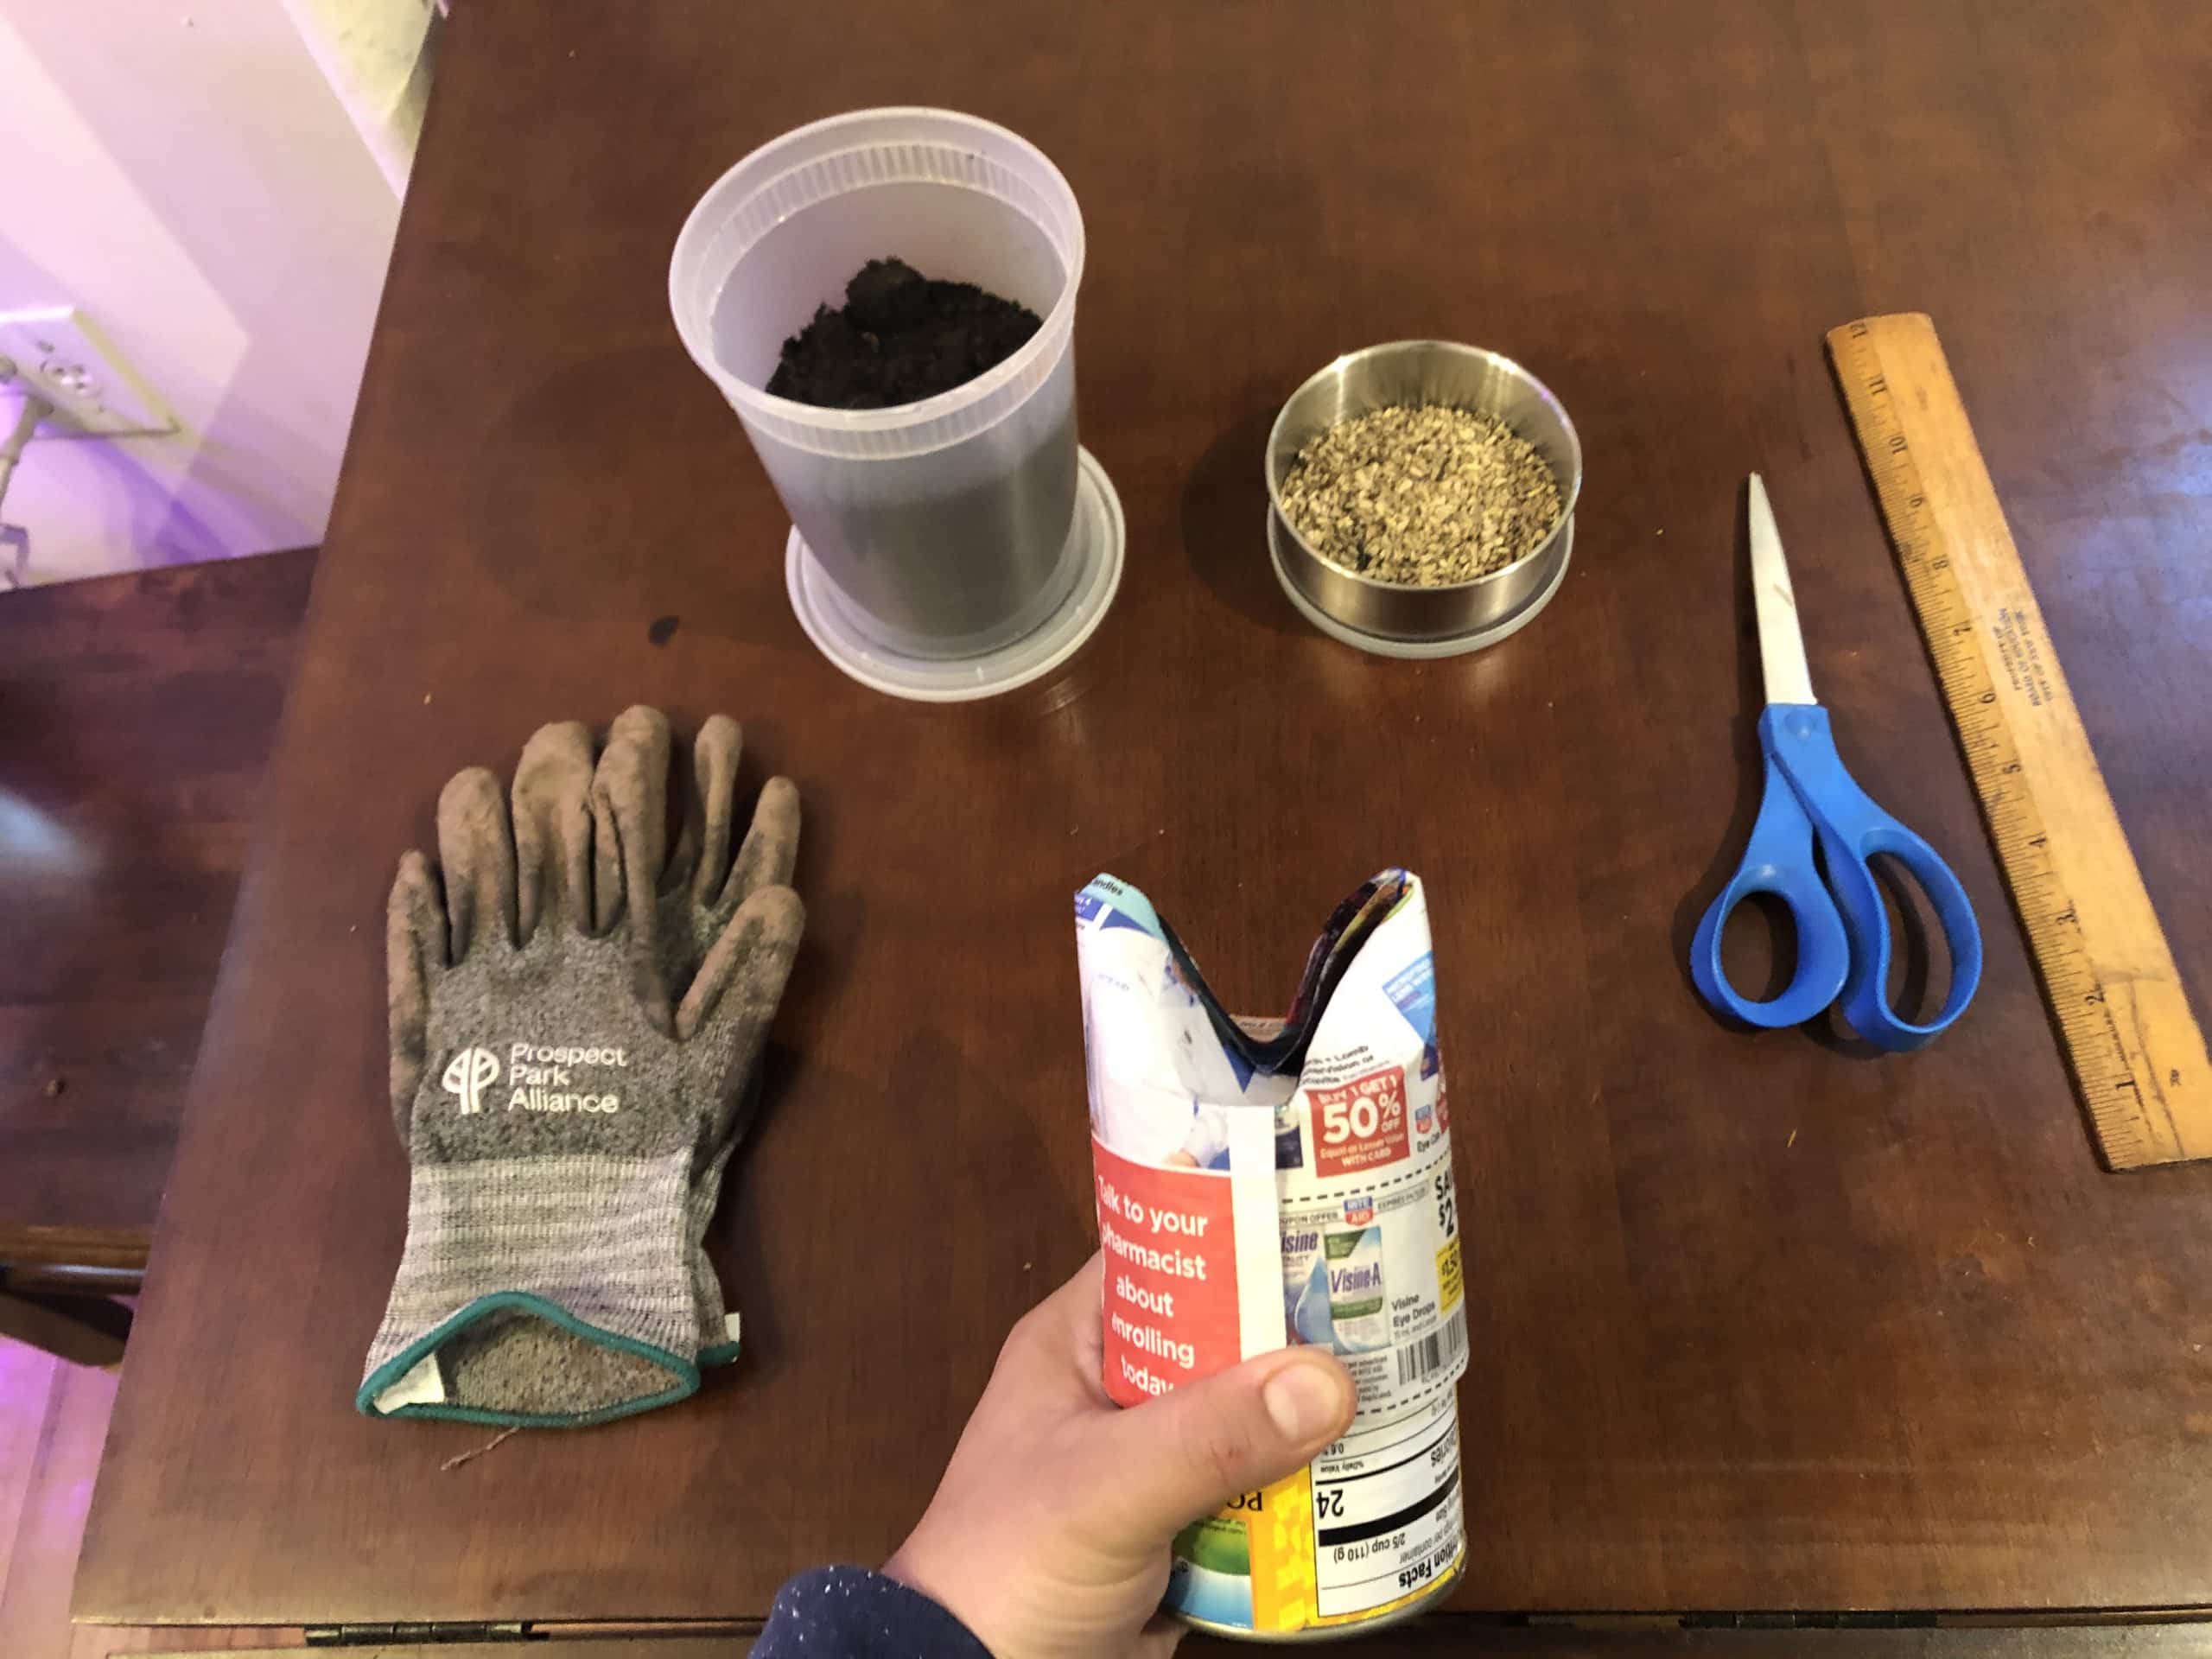
Supplies:
Light cardboard tube (toilet paper or paper towels tube)
Scissors
Soil (can be found at local hardware stores)
Gloves and scoop or trowel (helpful but not necessary)
Seeds (herbs, greens, radishes or any seeds)
Step 1. Take a sharp pair of scissors and cut the tube in half making two smaller tubes. If using a paper towel tube cut it into quarters making four smaller tubes.
Step 2. Make a 1 inch slit in the end of the tube on four sides evenly spaced apart creating four flaps.
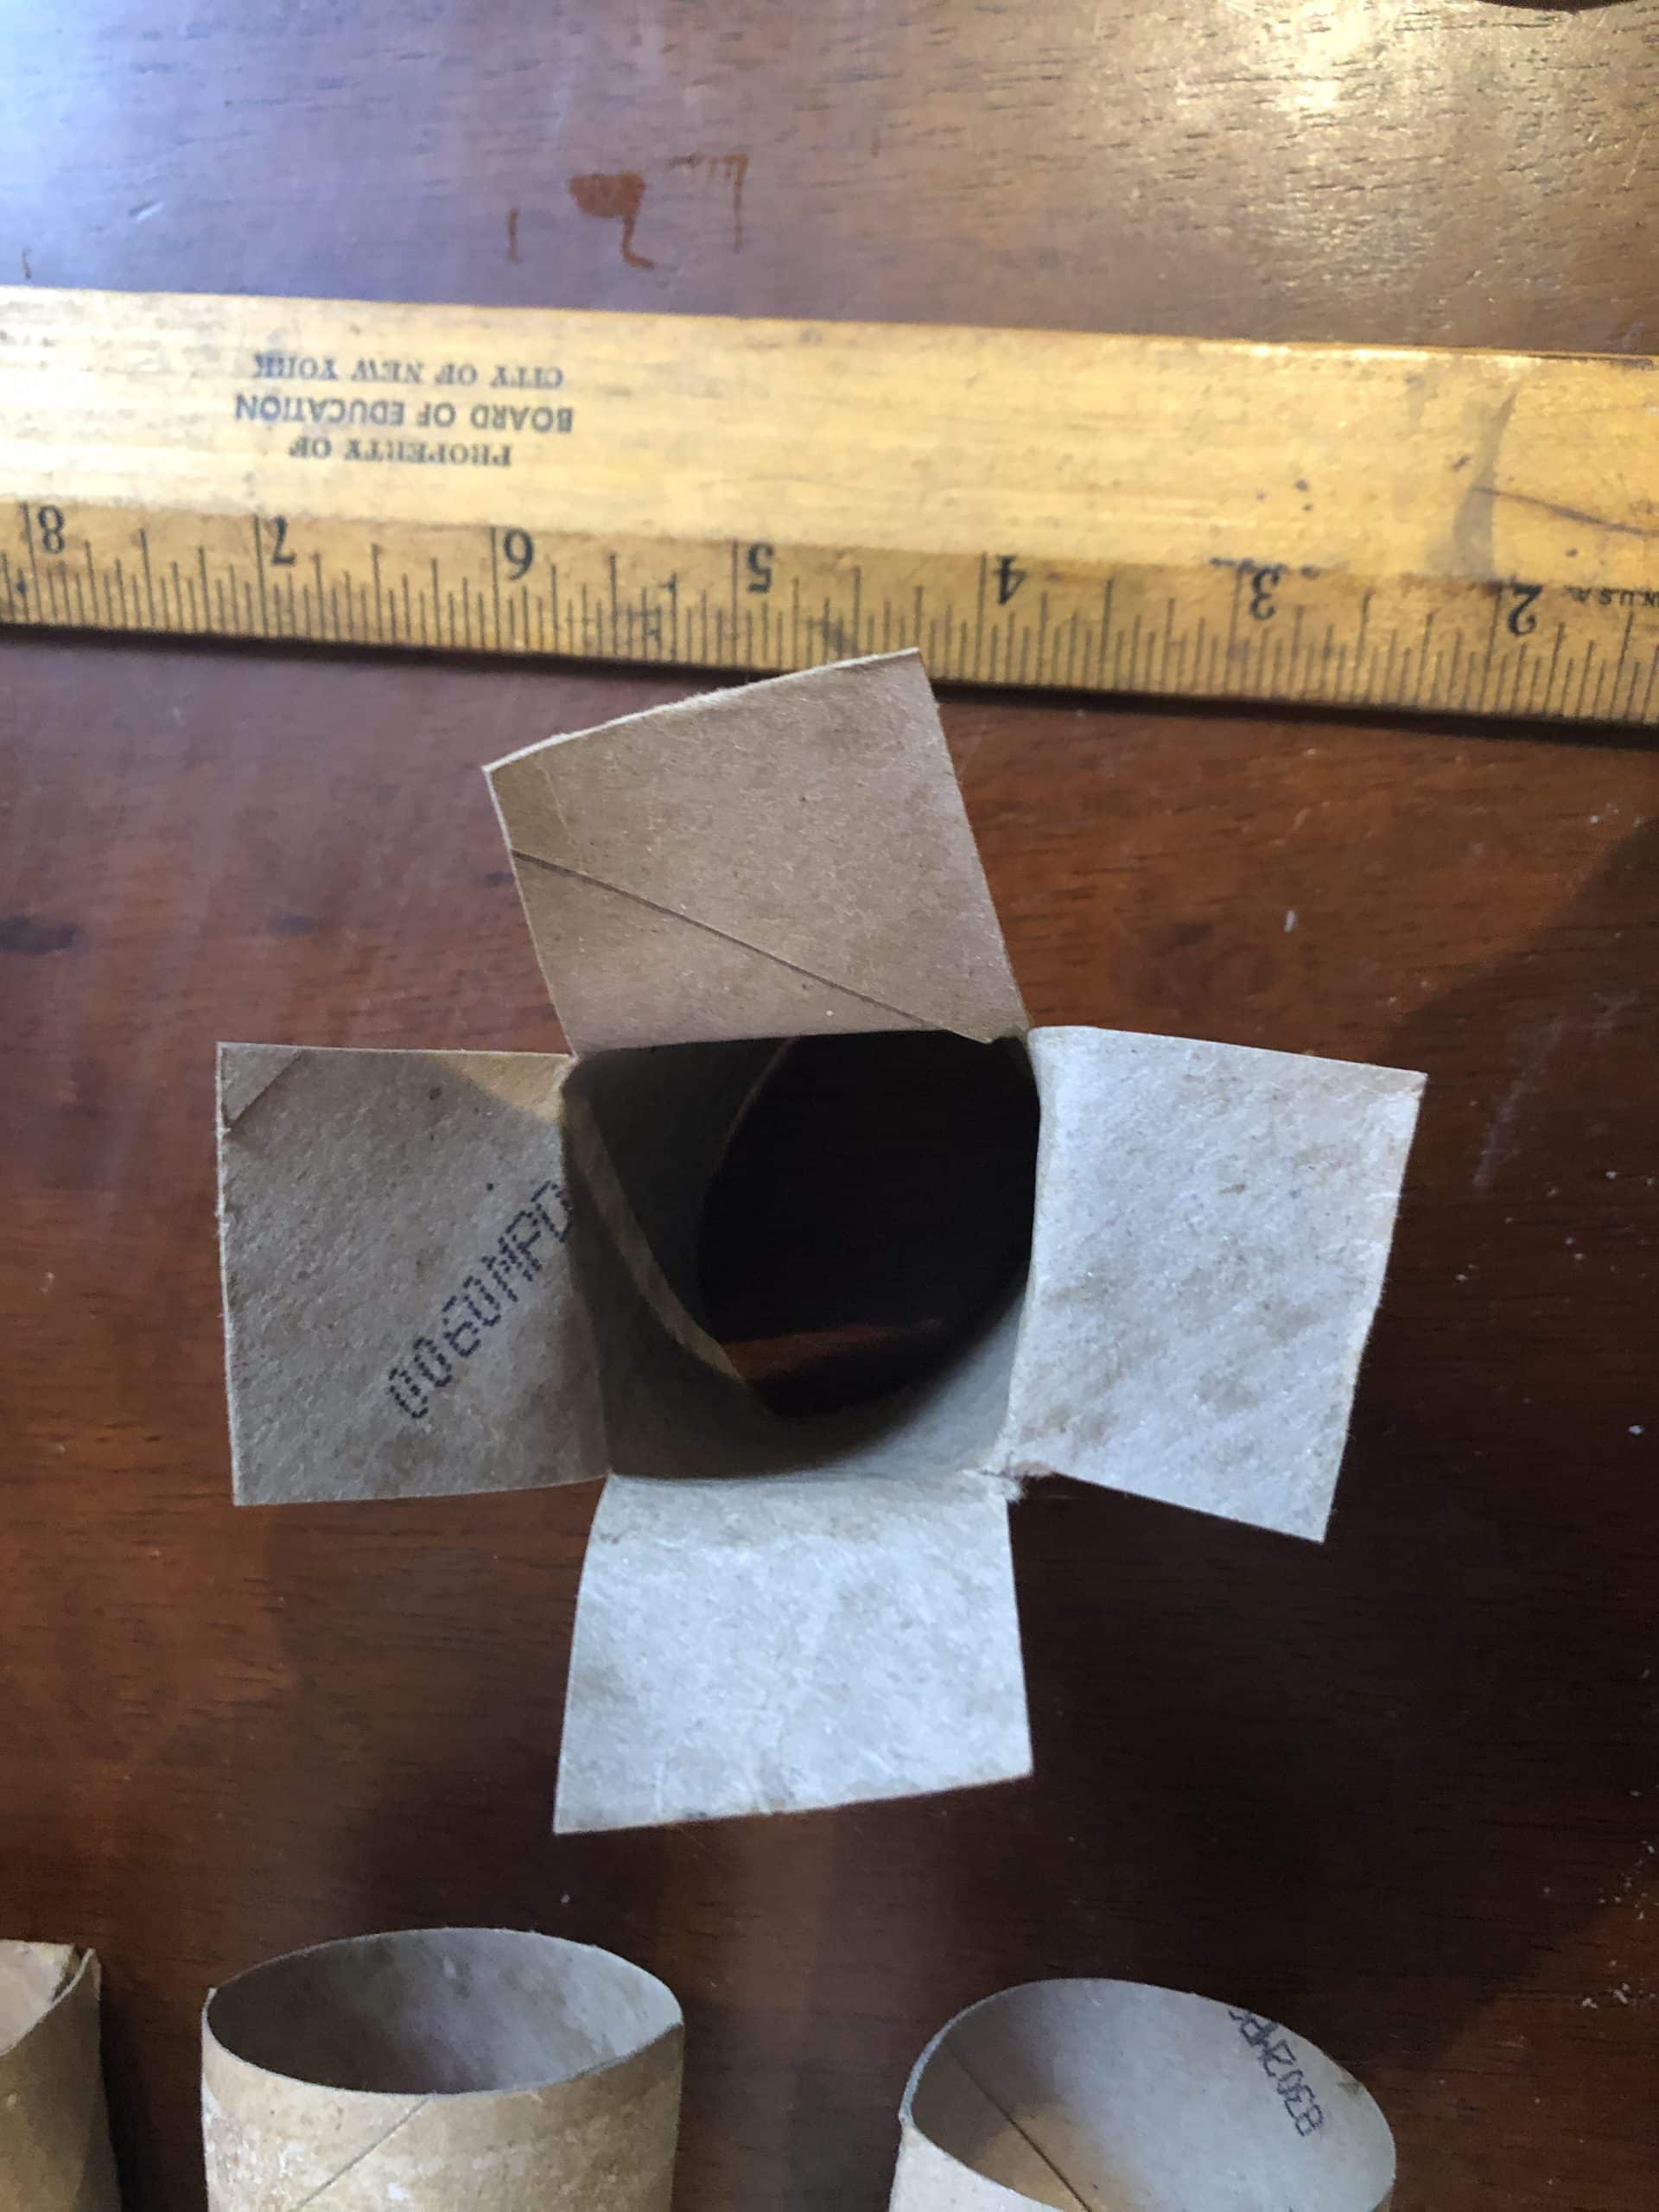
Step 3. Fold down the flaps on top of each other one at a time.
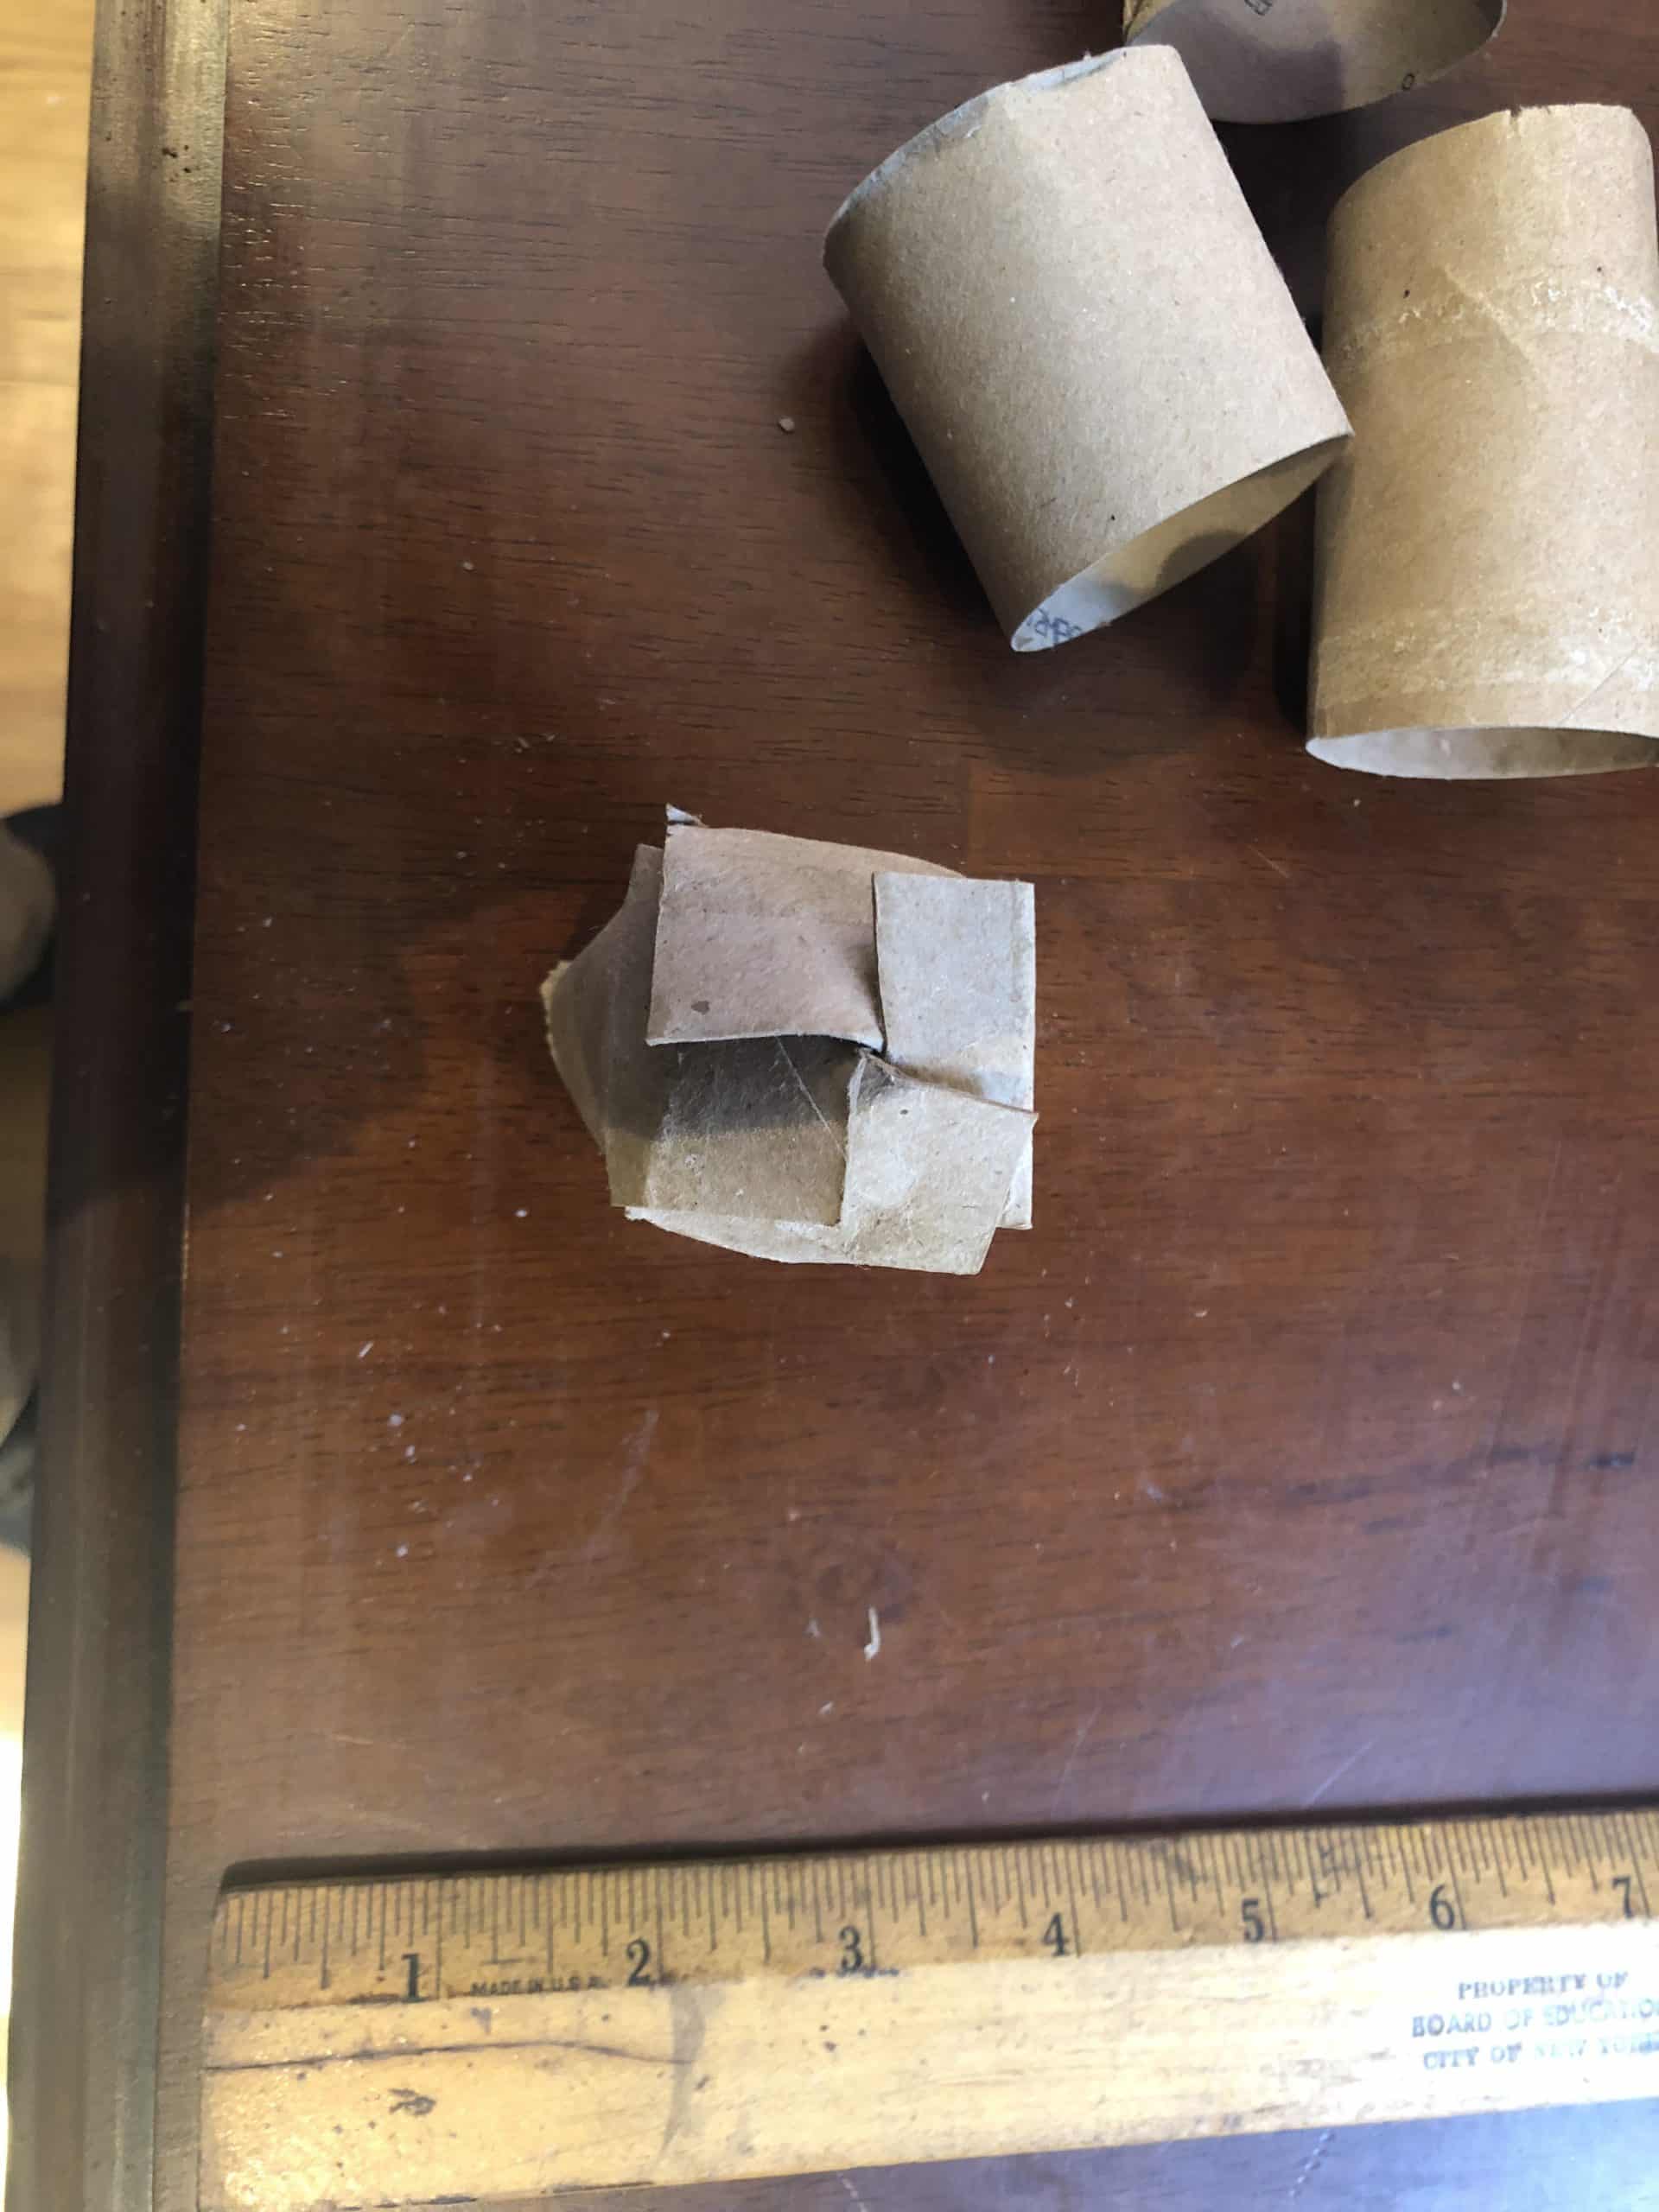
Step 4. Once all flaps are folded in, take the edge of the first flap and lift it over the edge of the fourth flap to seal it like you might fold a cardboard box shut.
Step 5. Using a scoop, trowel or your hands fill your seed starter with soil.
Step 6. Place 3-5 small seeds on the surface and push them in until they are covered with ½ inch of soil. If too many seeds are planted they will not have space to grow. If the seeds are planted too deep they may not germinate.
Step 7. Place your planted seed starter on a small dish, gently water it and place it in a warm sunny space. Be sure not to over water or your seed starter will become a ball of mud.
Finally. Follow the instructions on your seed packet. Most seeds can be transplanted into the ground or a larger pot after about 4 weeks.
Instructions for eggshell seed starters
Supplies:
Cleaned eggshells
Paper egg carton
Kitchen knife
Pin or sharp point
Dish soap (helpful but not necessary)
Soil (can be found at local hardware stores)
Gloves and scoop or trowel (helpful but not necessary)
Seeds (herbs, greens, radishes or any seeds)
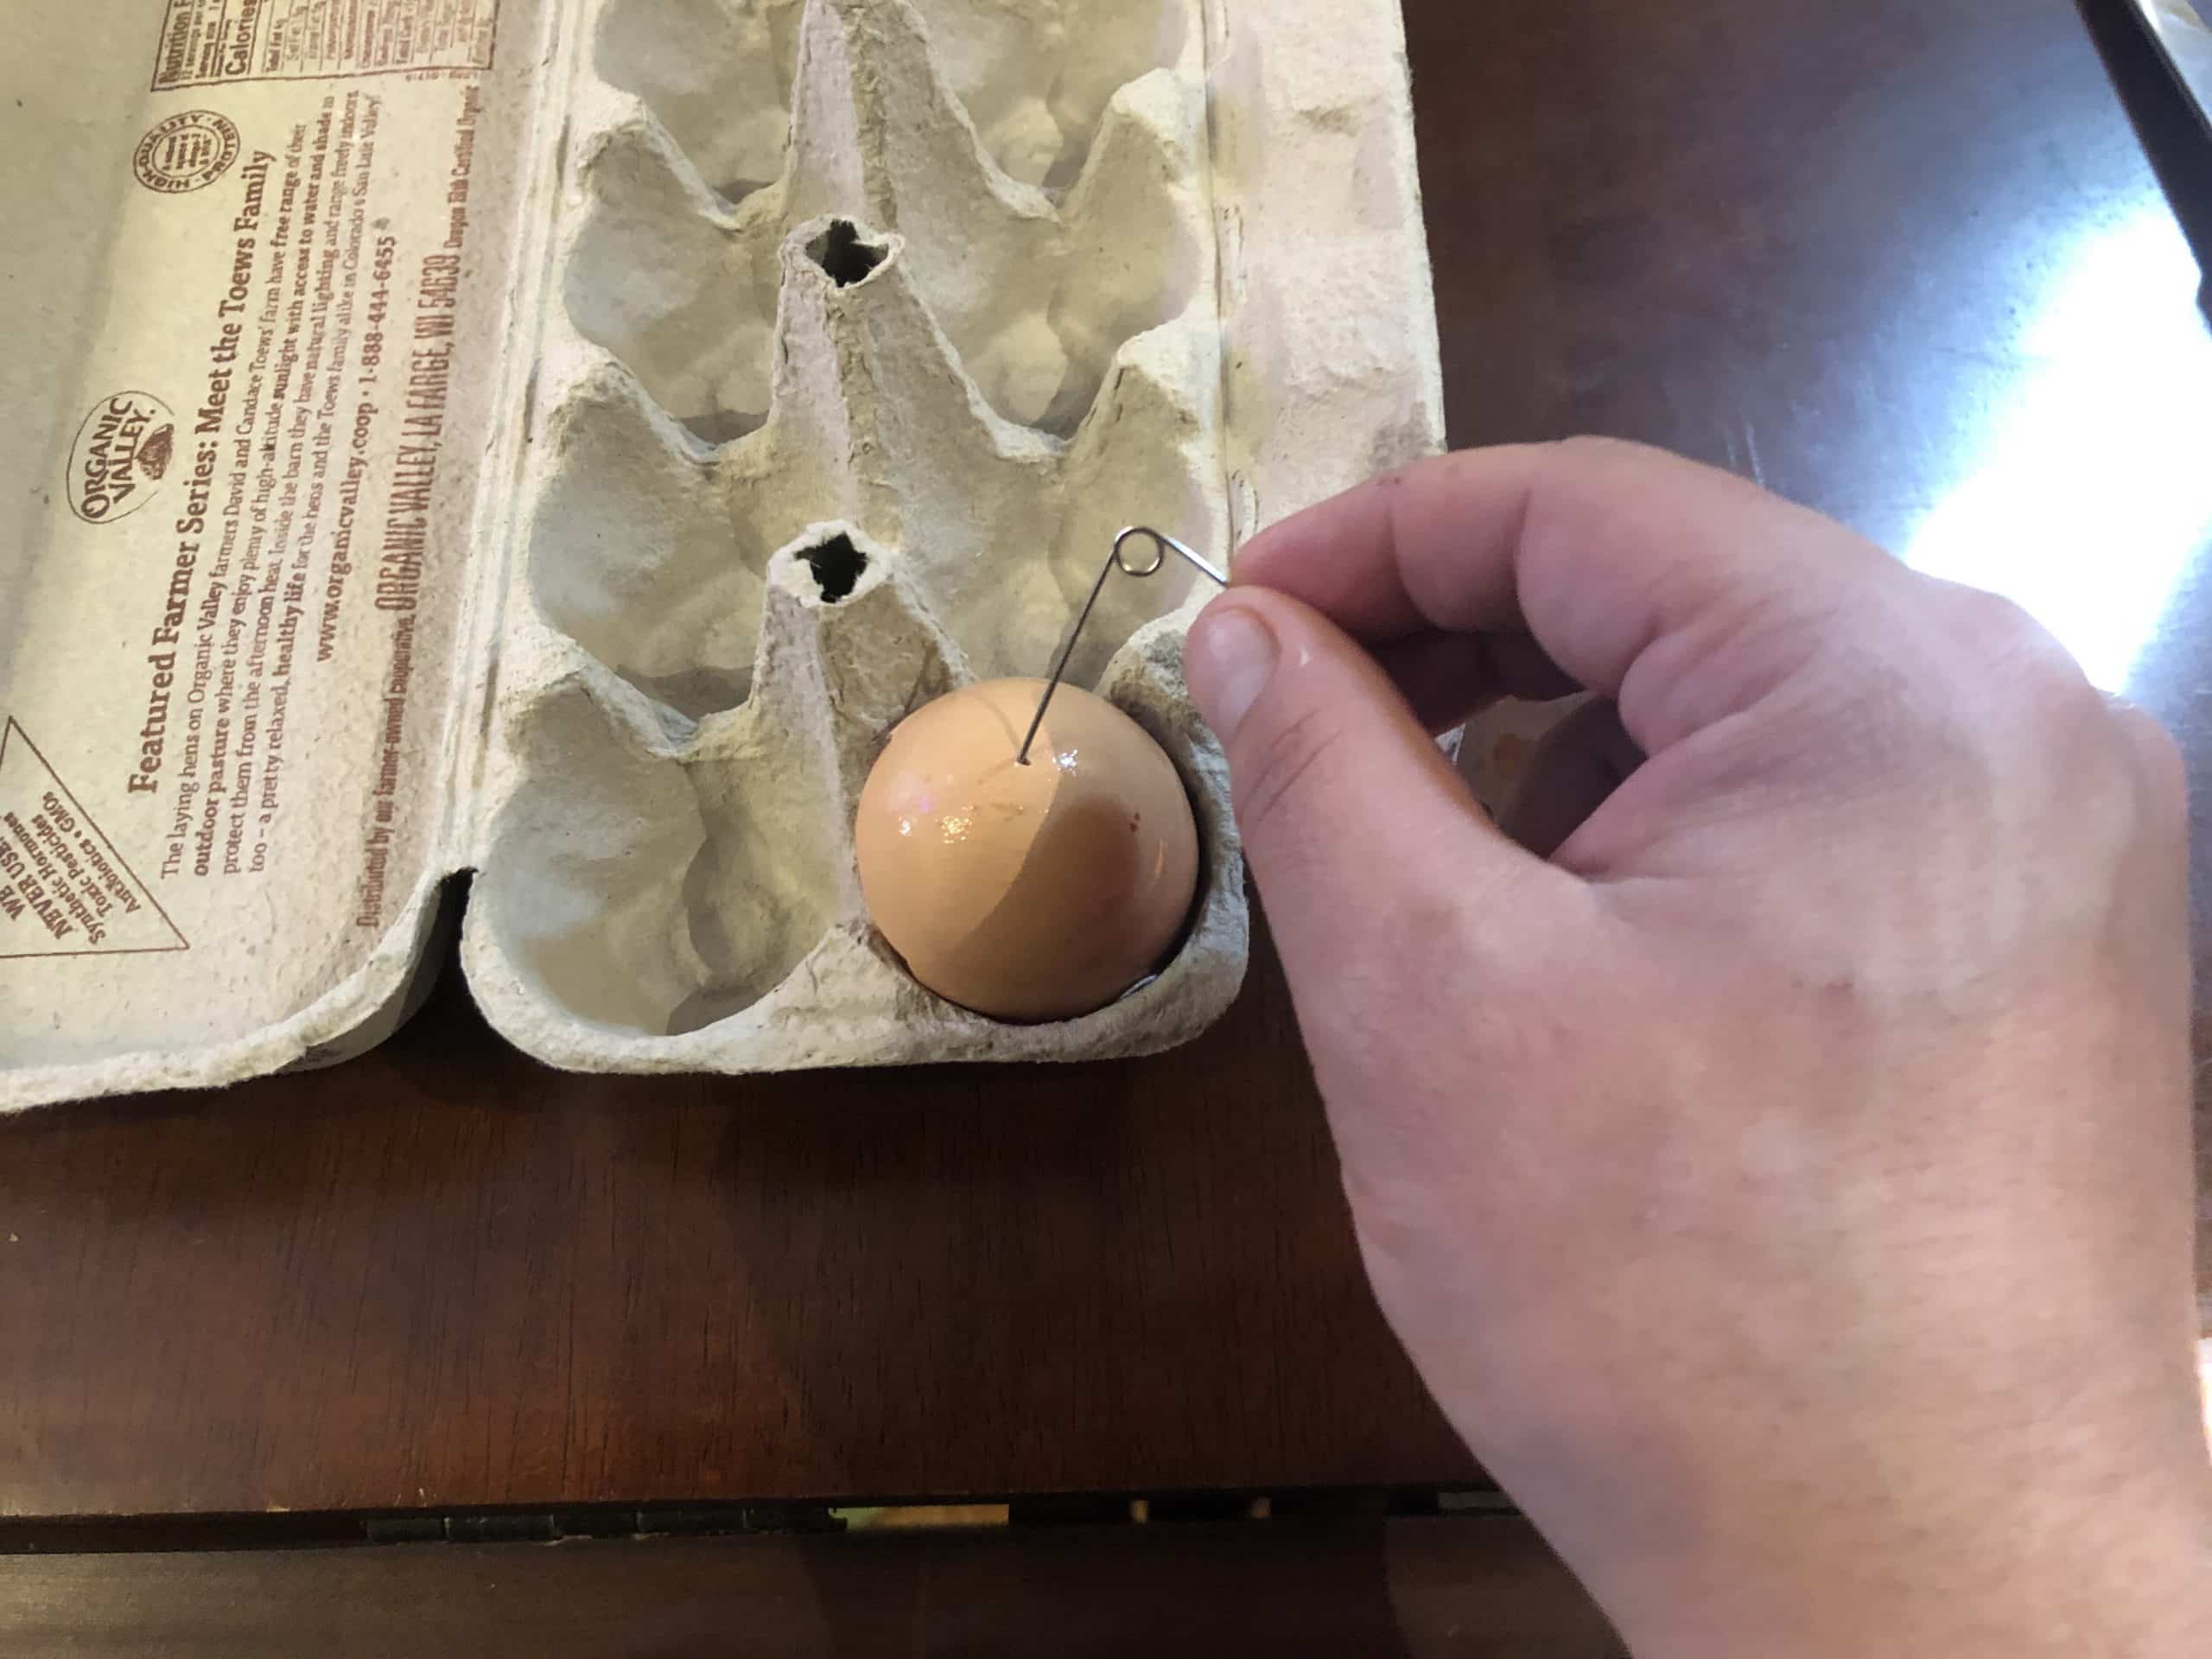
Step 1. Using a kitchen knife make a crack about ½ inch from the point of the egg then cut the rest of the way through the top, this creates a clean opening (this is possible with a fork or spoon but be gentle as the egg with crack more irregularly).
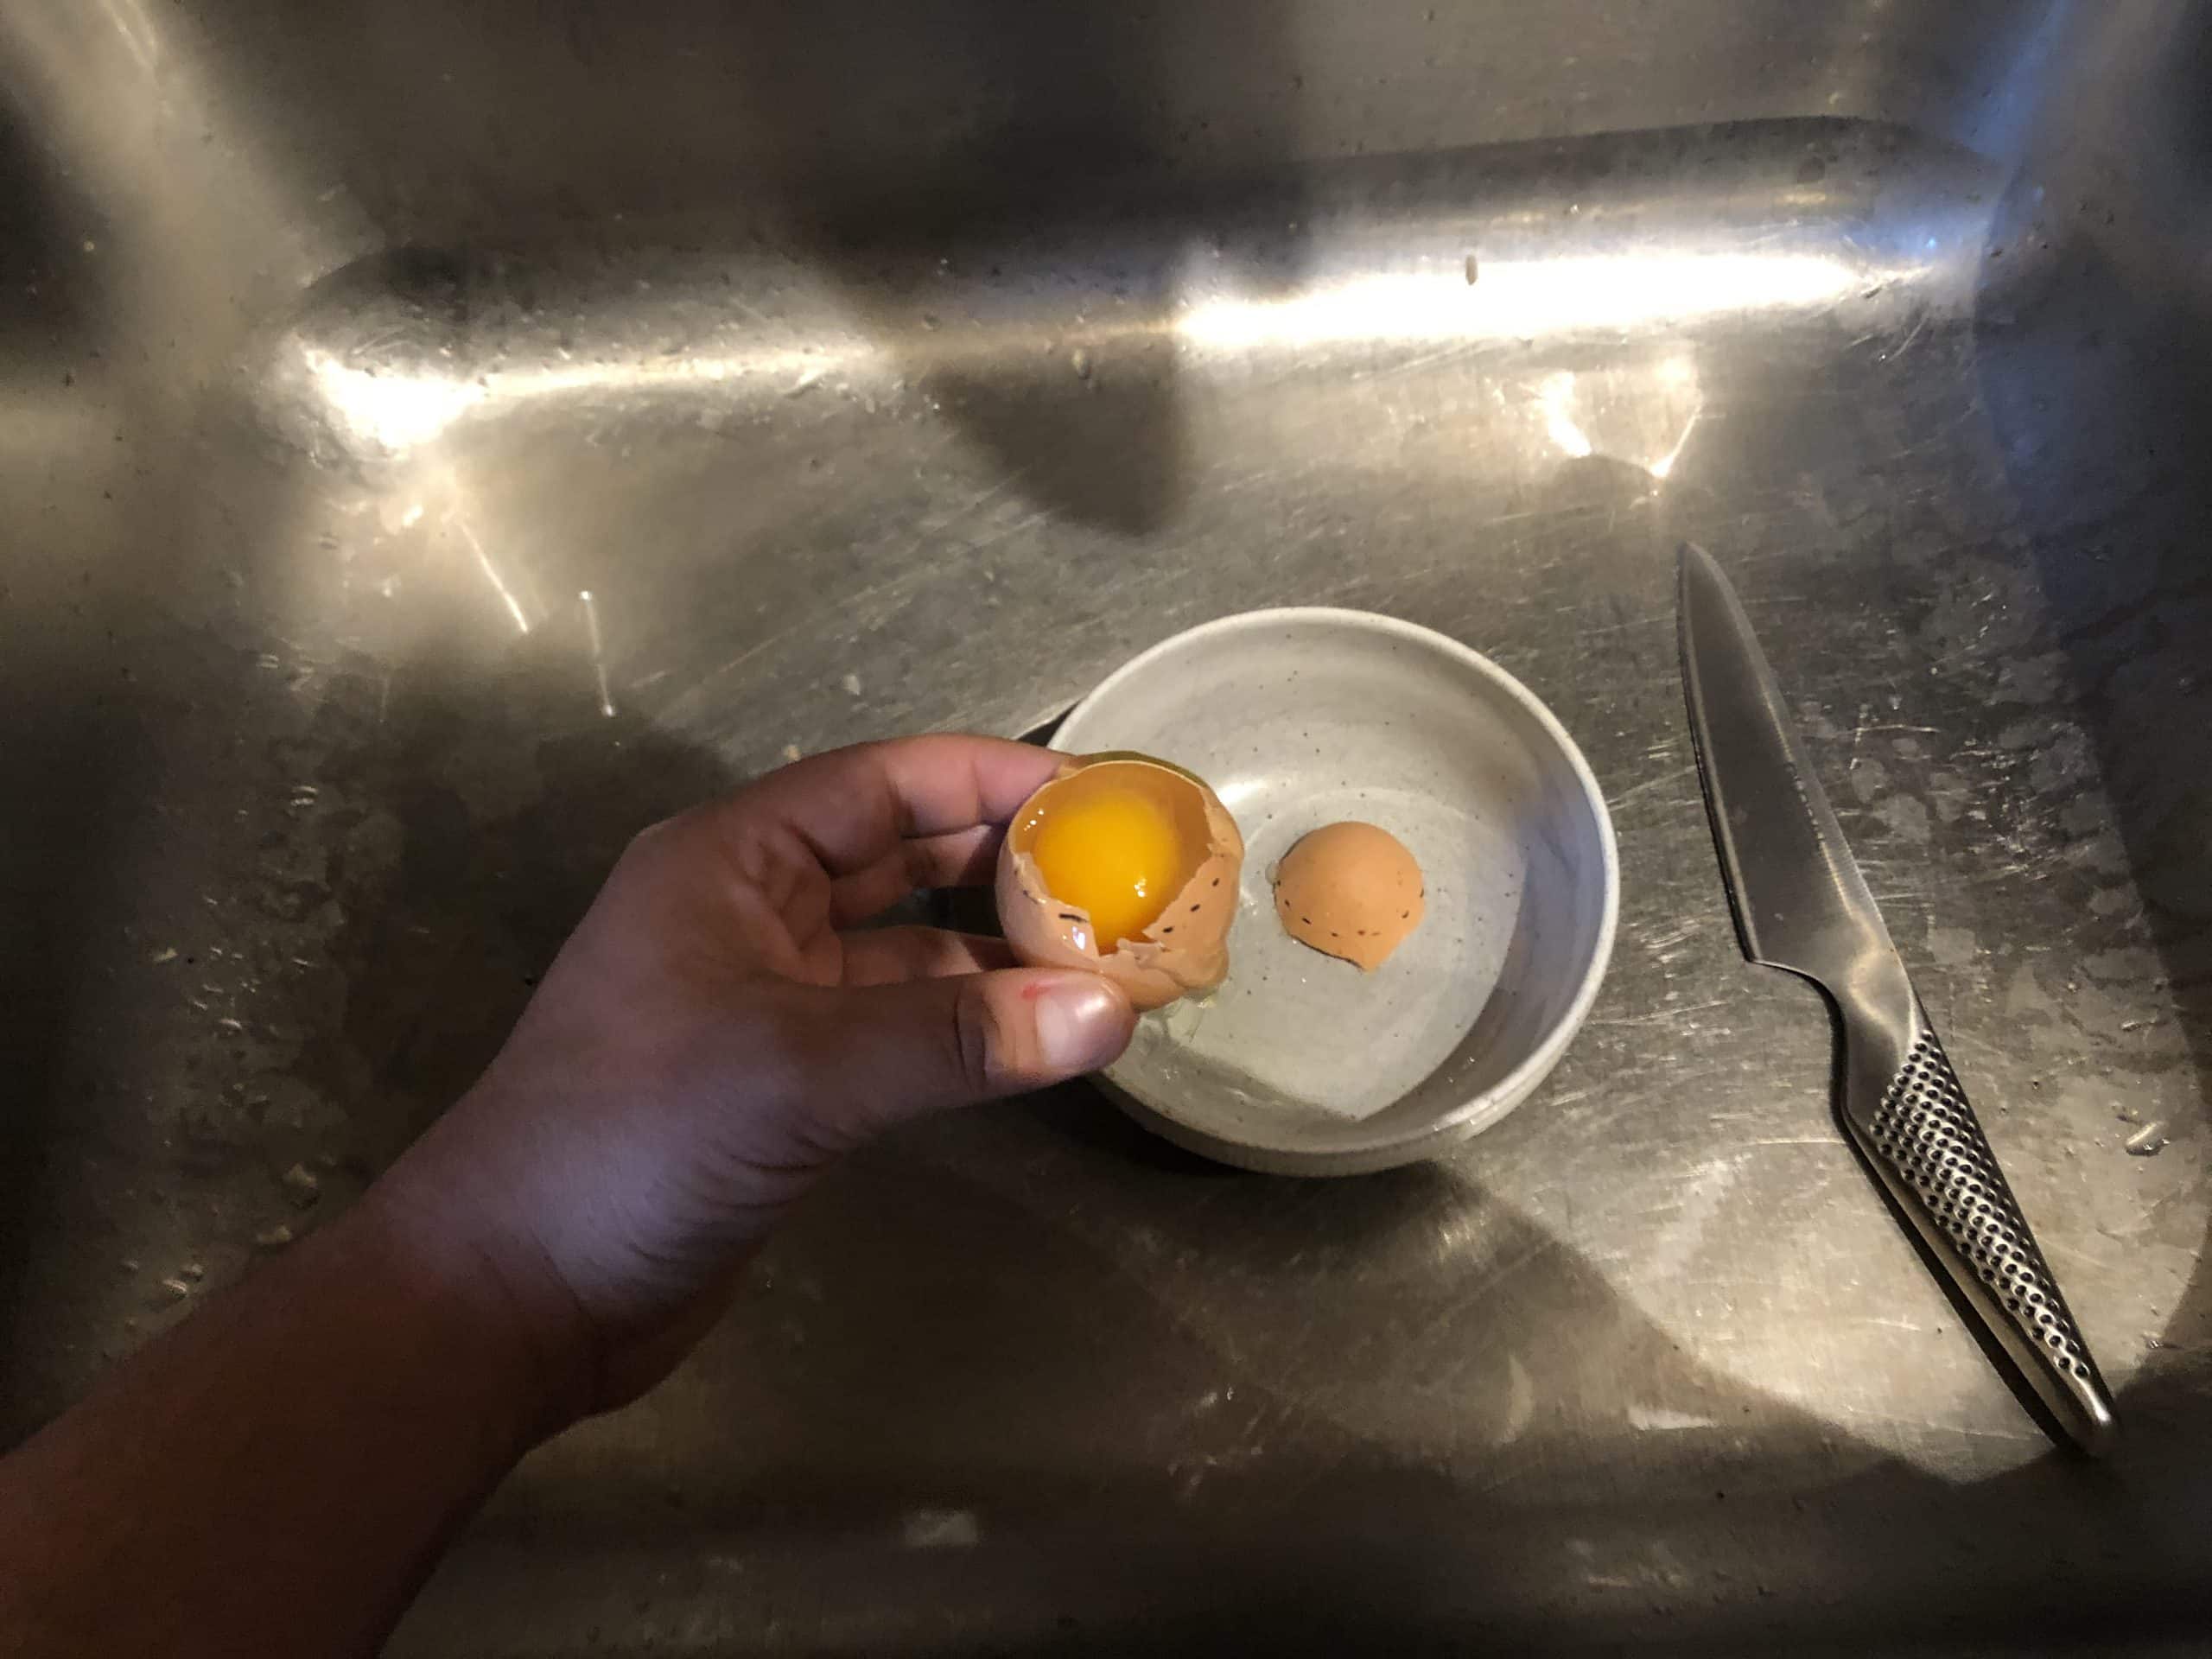
Step 2. Cook something! Please make sure to use the egg. We recommend Mrs. Lefferts cornbread recipe.
Step 3. Wash the eggshell thoroughly. A small drop of dish soap is recommended if stubborn residue remains but be sure to rinse it out completely.
Step 4. Using a pin or sharp point make a small hole in the rounded bottom of the egg. This will help with water drainage and air circulation. This takes more force than you expect but don’t crack the shell!
Step 5. Using a scoop, trowel or your hands fill your eggshell with soil. Place 3-5 small seeds on the surface and push them in until they are covered with ½ inch of soil. If too many seeds are
planted they will not have space to grow. If the seeds are planted too deep they may not germinate.
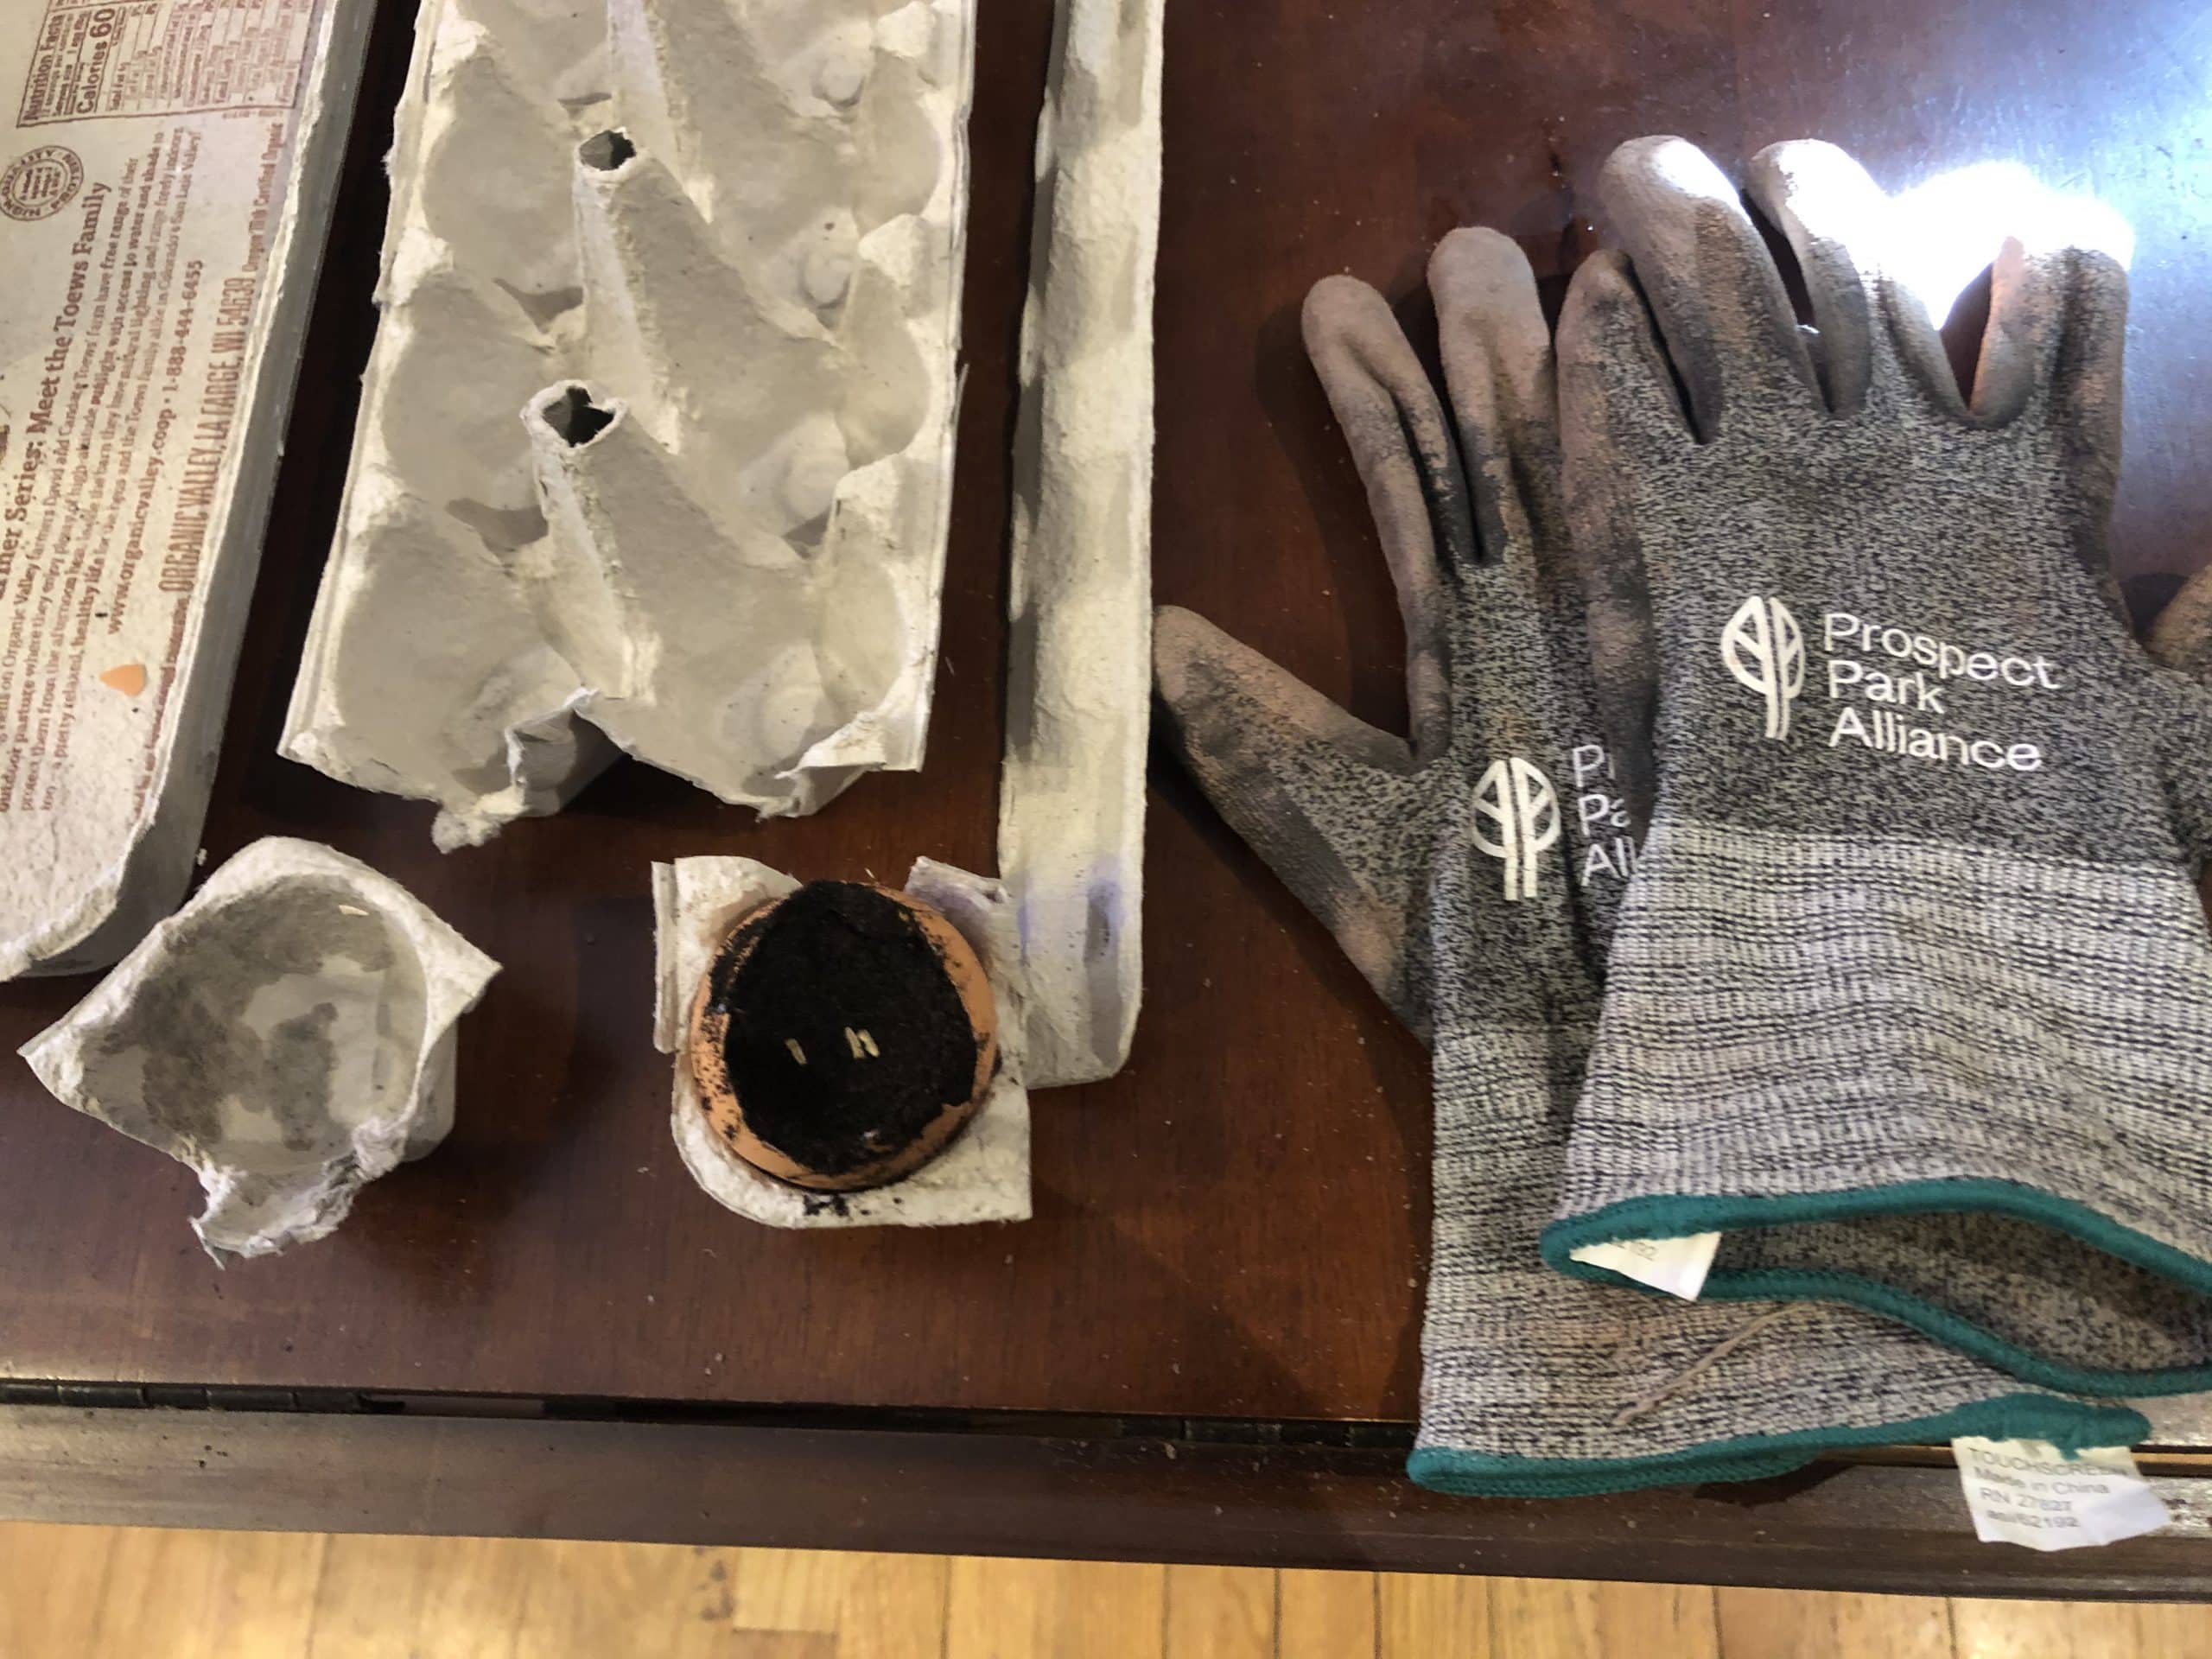
Step 7. Place your planted seed starter in an egg carton—whole, or cut into pieces—and gently water it and place it in a warm sunny space. Be sure not to over-water or your seed starter will become a ball of mud.
Finally. Follow the instructions on your seed packet. Most seeds can be transplanted into the ground or a larger pot after about 4 weeks.
Making egg carton seed starters:
Supplies:
Cardboard egg carton (styrofoam is not compostable)
Scissors
Soil (can be found at local hardware stores)
Gloves and scoop or trowel (helpful but not necessary)
Seeds (herbs, greens, radishes or any seeds)
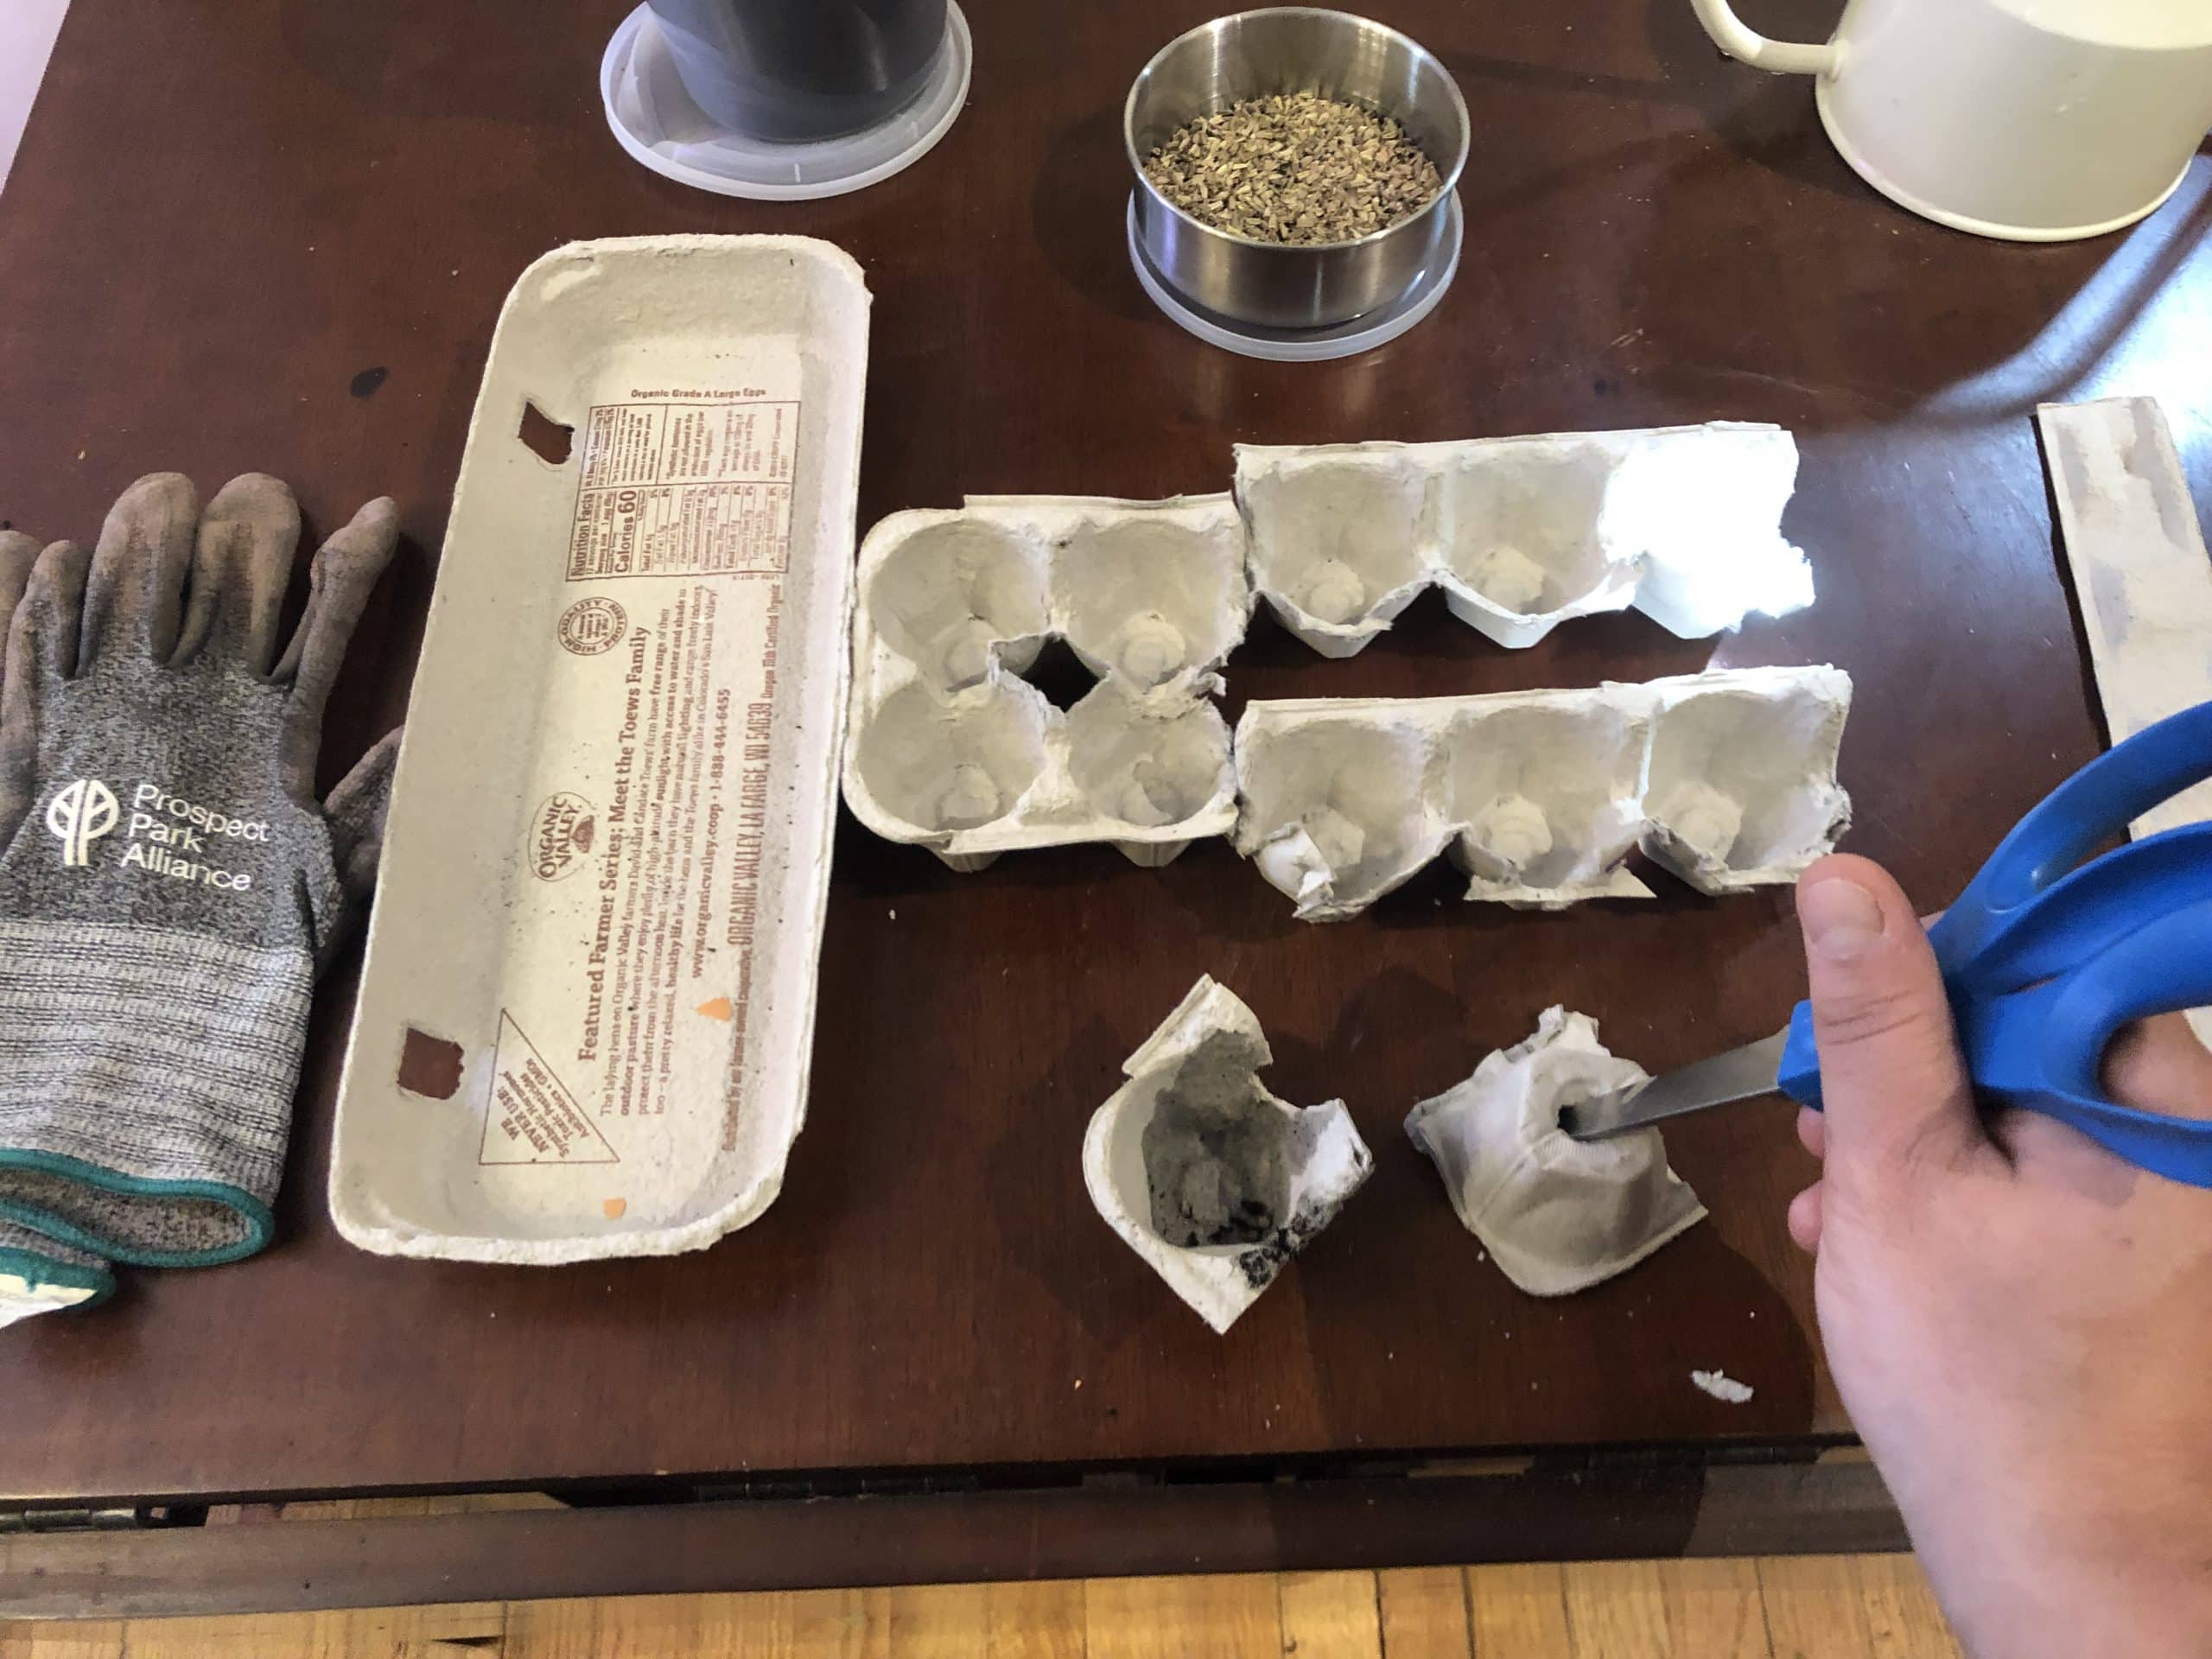
Step 1. Using scissors cut the lid off the egg carton and put it aside. You can choose to cut out the individual egg holders, keep it as one piece or cut them into segments with as many egg
holders per piece as you like. (If planting different types of seeds we recommend separating the egg holders and labeling them so you can easily identify the growing seedlings).
Step 2. Using scissors cut a small hole in the bottom of each egg holder. This will help with water drainage and air circulation.
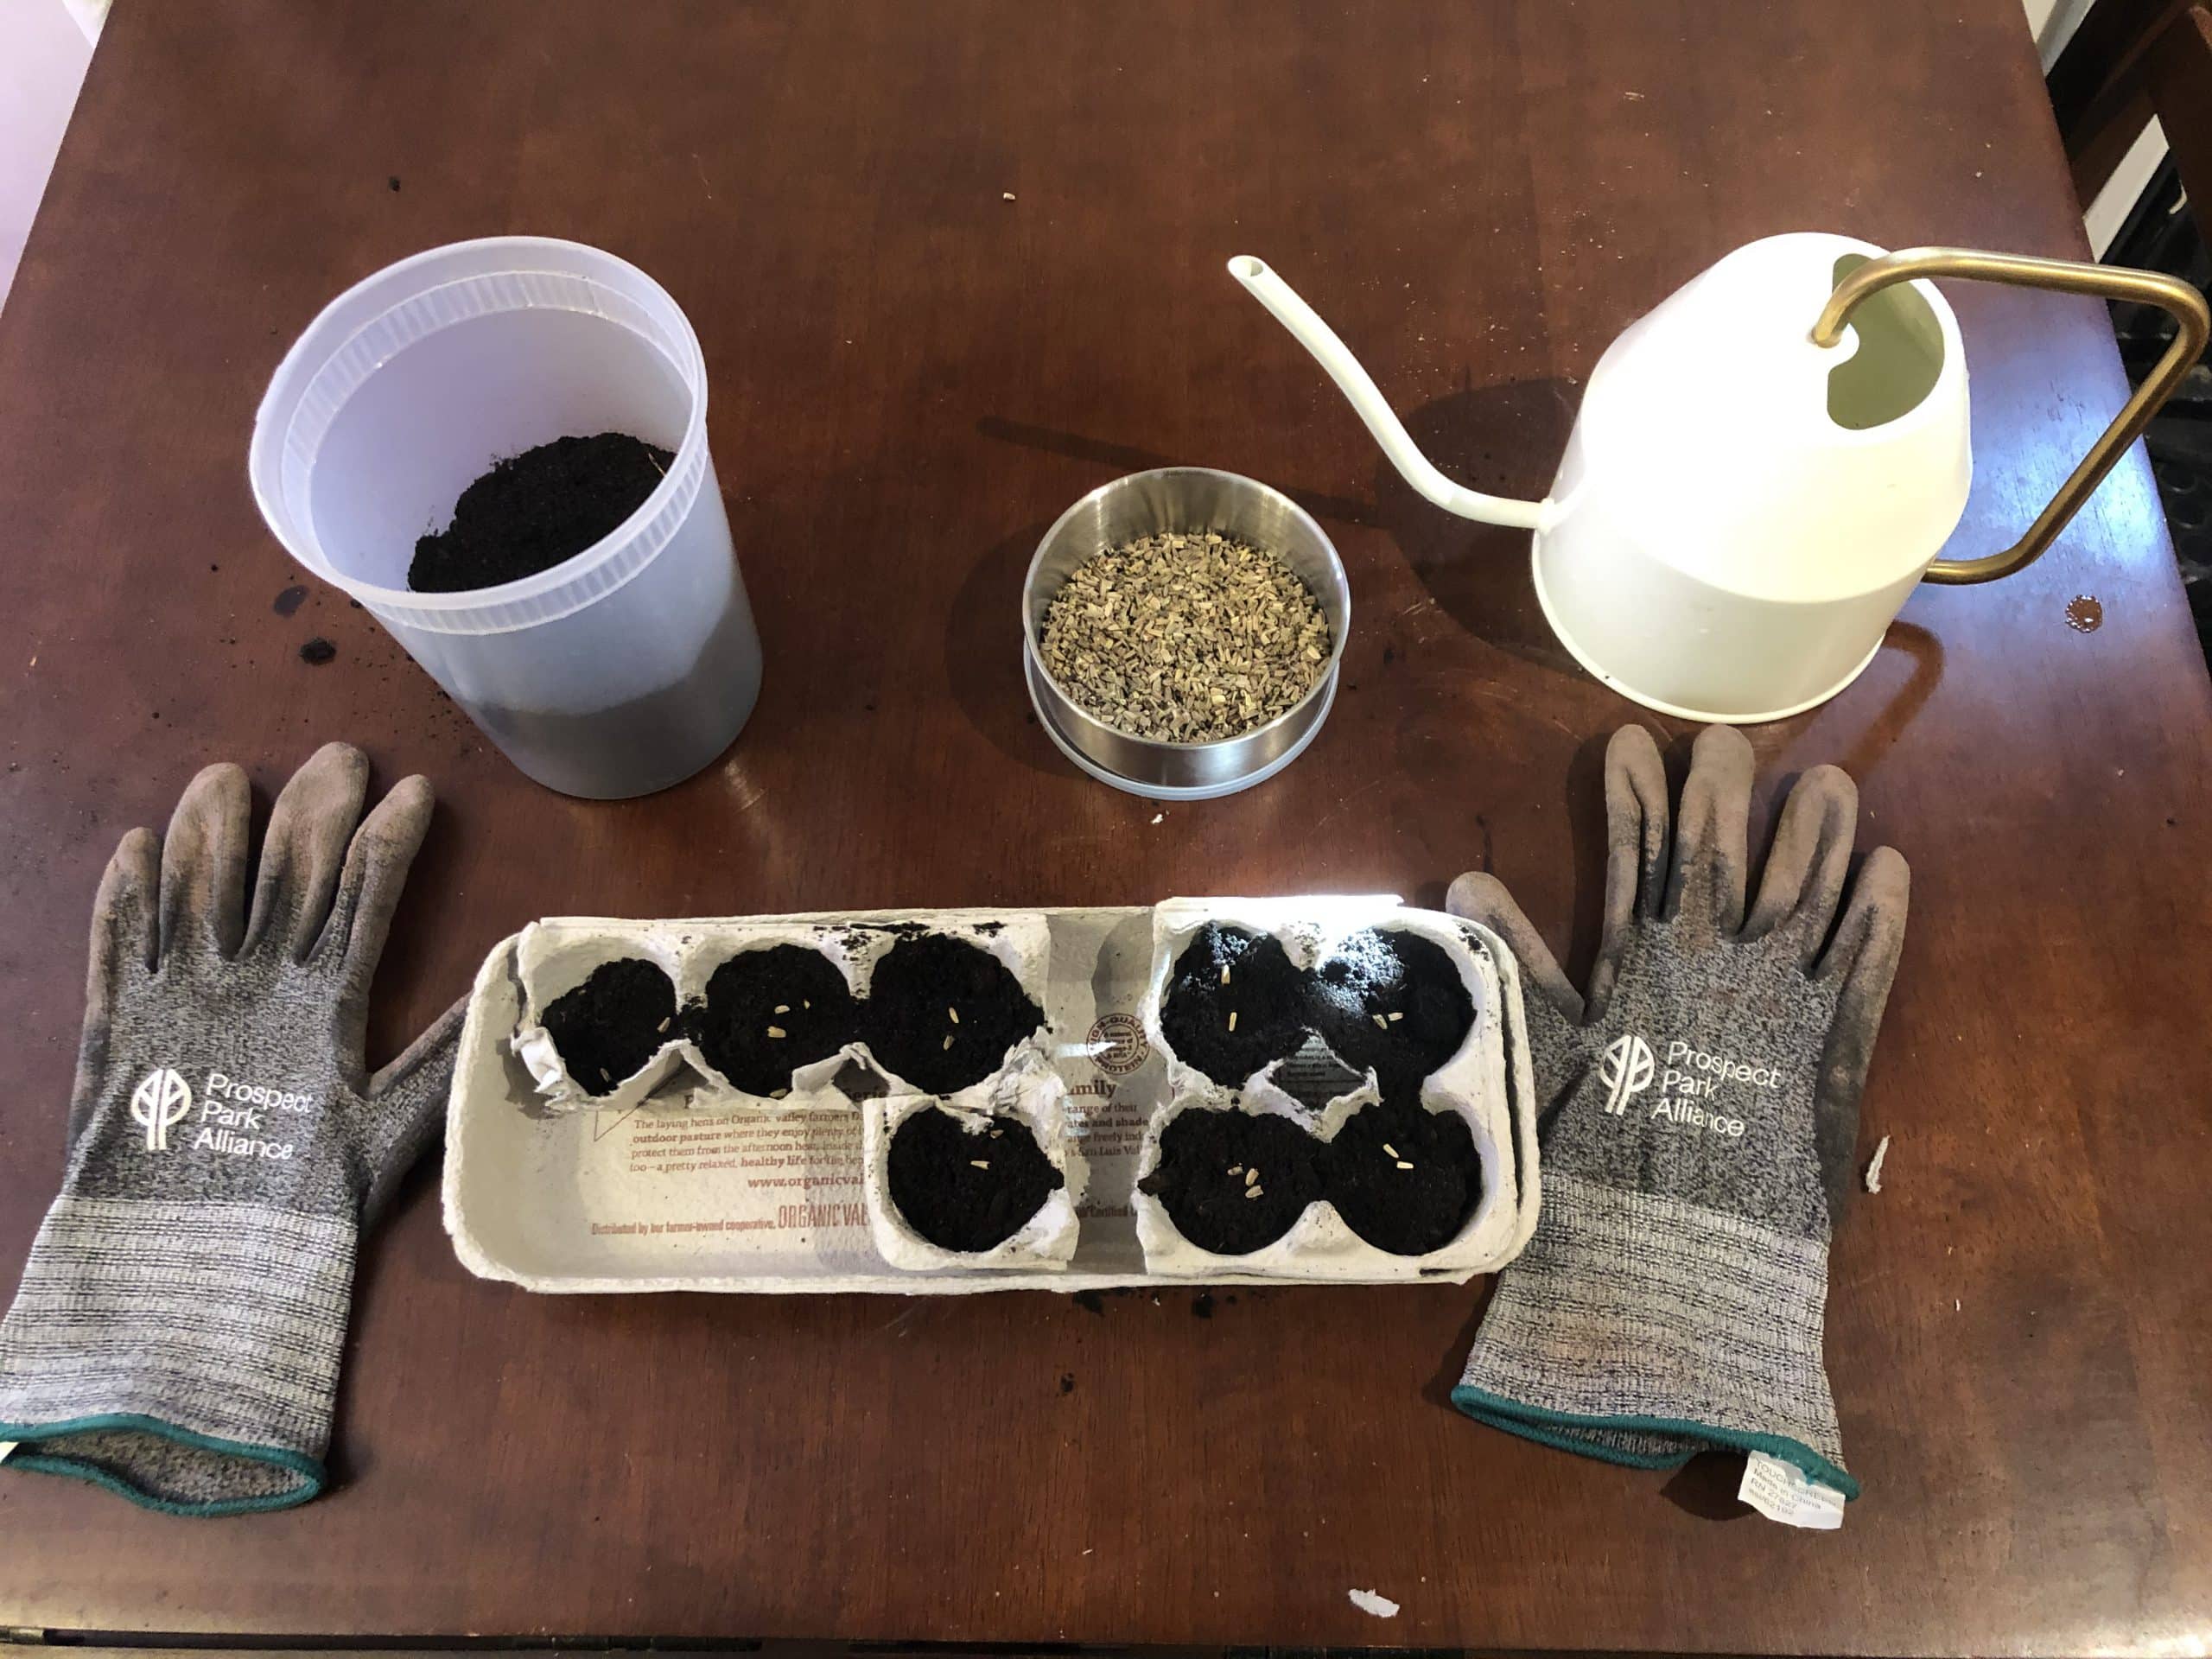
Step 3. Using a scoop, trowel or your hands fill your seed starter with soil. Place 3-5 small seeds on the surface and push them in until they are covered with ½ inch of soil. If too many seeds are planted they will not have space to grow. If the seeds are planted too deep they may not germinate.
Step 4. Place your planted seed starter in the top of the egg carton you set aside earlier, gently water it and place it in a warm sunny space. Be sure not to over water or your seed starter will become a ball of mud.
Finally. Follow the instructions on your seed packet. Most seeds can be transplanted into the ground or a larger pot after about 4 weeks.
Instructions for paper seed starters
Supplies:
Paper (newspaper, scrap brown or white paper. Glossy or color paper is not compostable)
Scissors
Ruler (helpful but not necessary)
A sturdy cylinder (a cup, jar or can)
Soil (can be found at local hardware stores)
Gloves and scoop or trowel (helpful but not necessary)
Seeds (herbs, greens, radishes or any seeds)
Step 1. Cut the paper into a strip 5 inches wide by 12-18 inches long
Step 2. Create a 1 inch fold from one edge in towards the middle of the strip. This will eventually form the top of the seed starter.
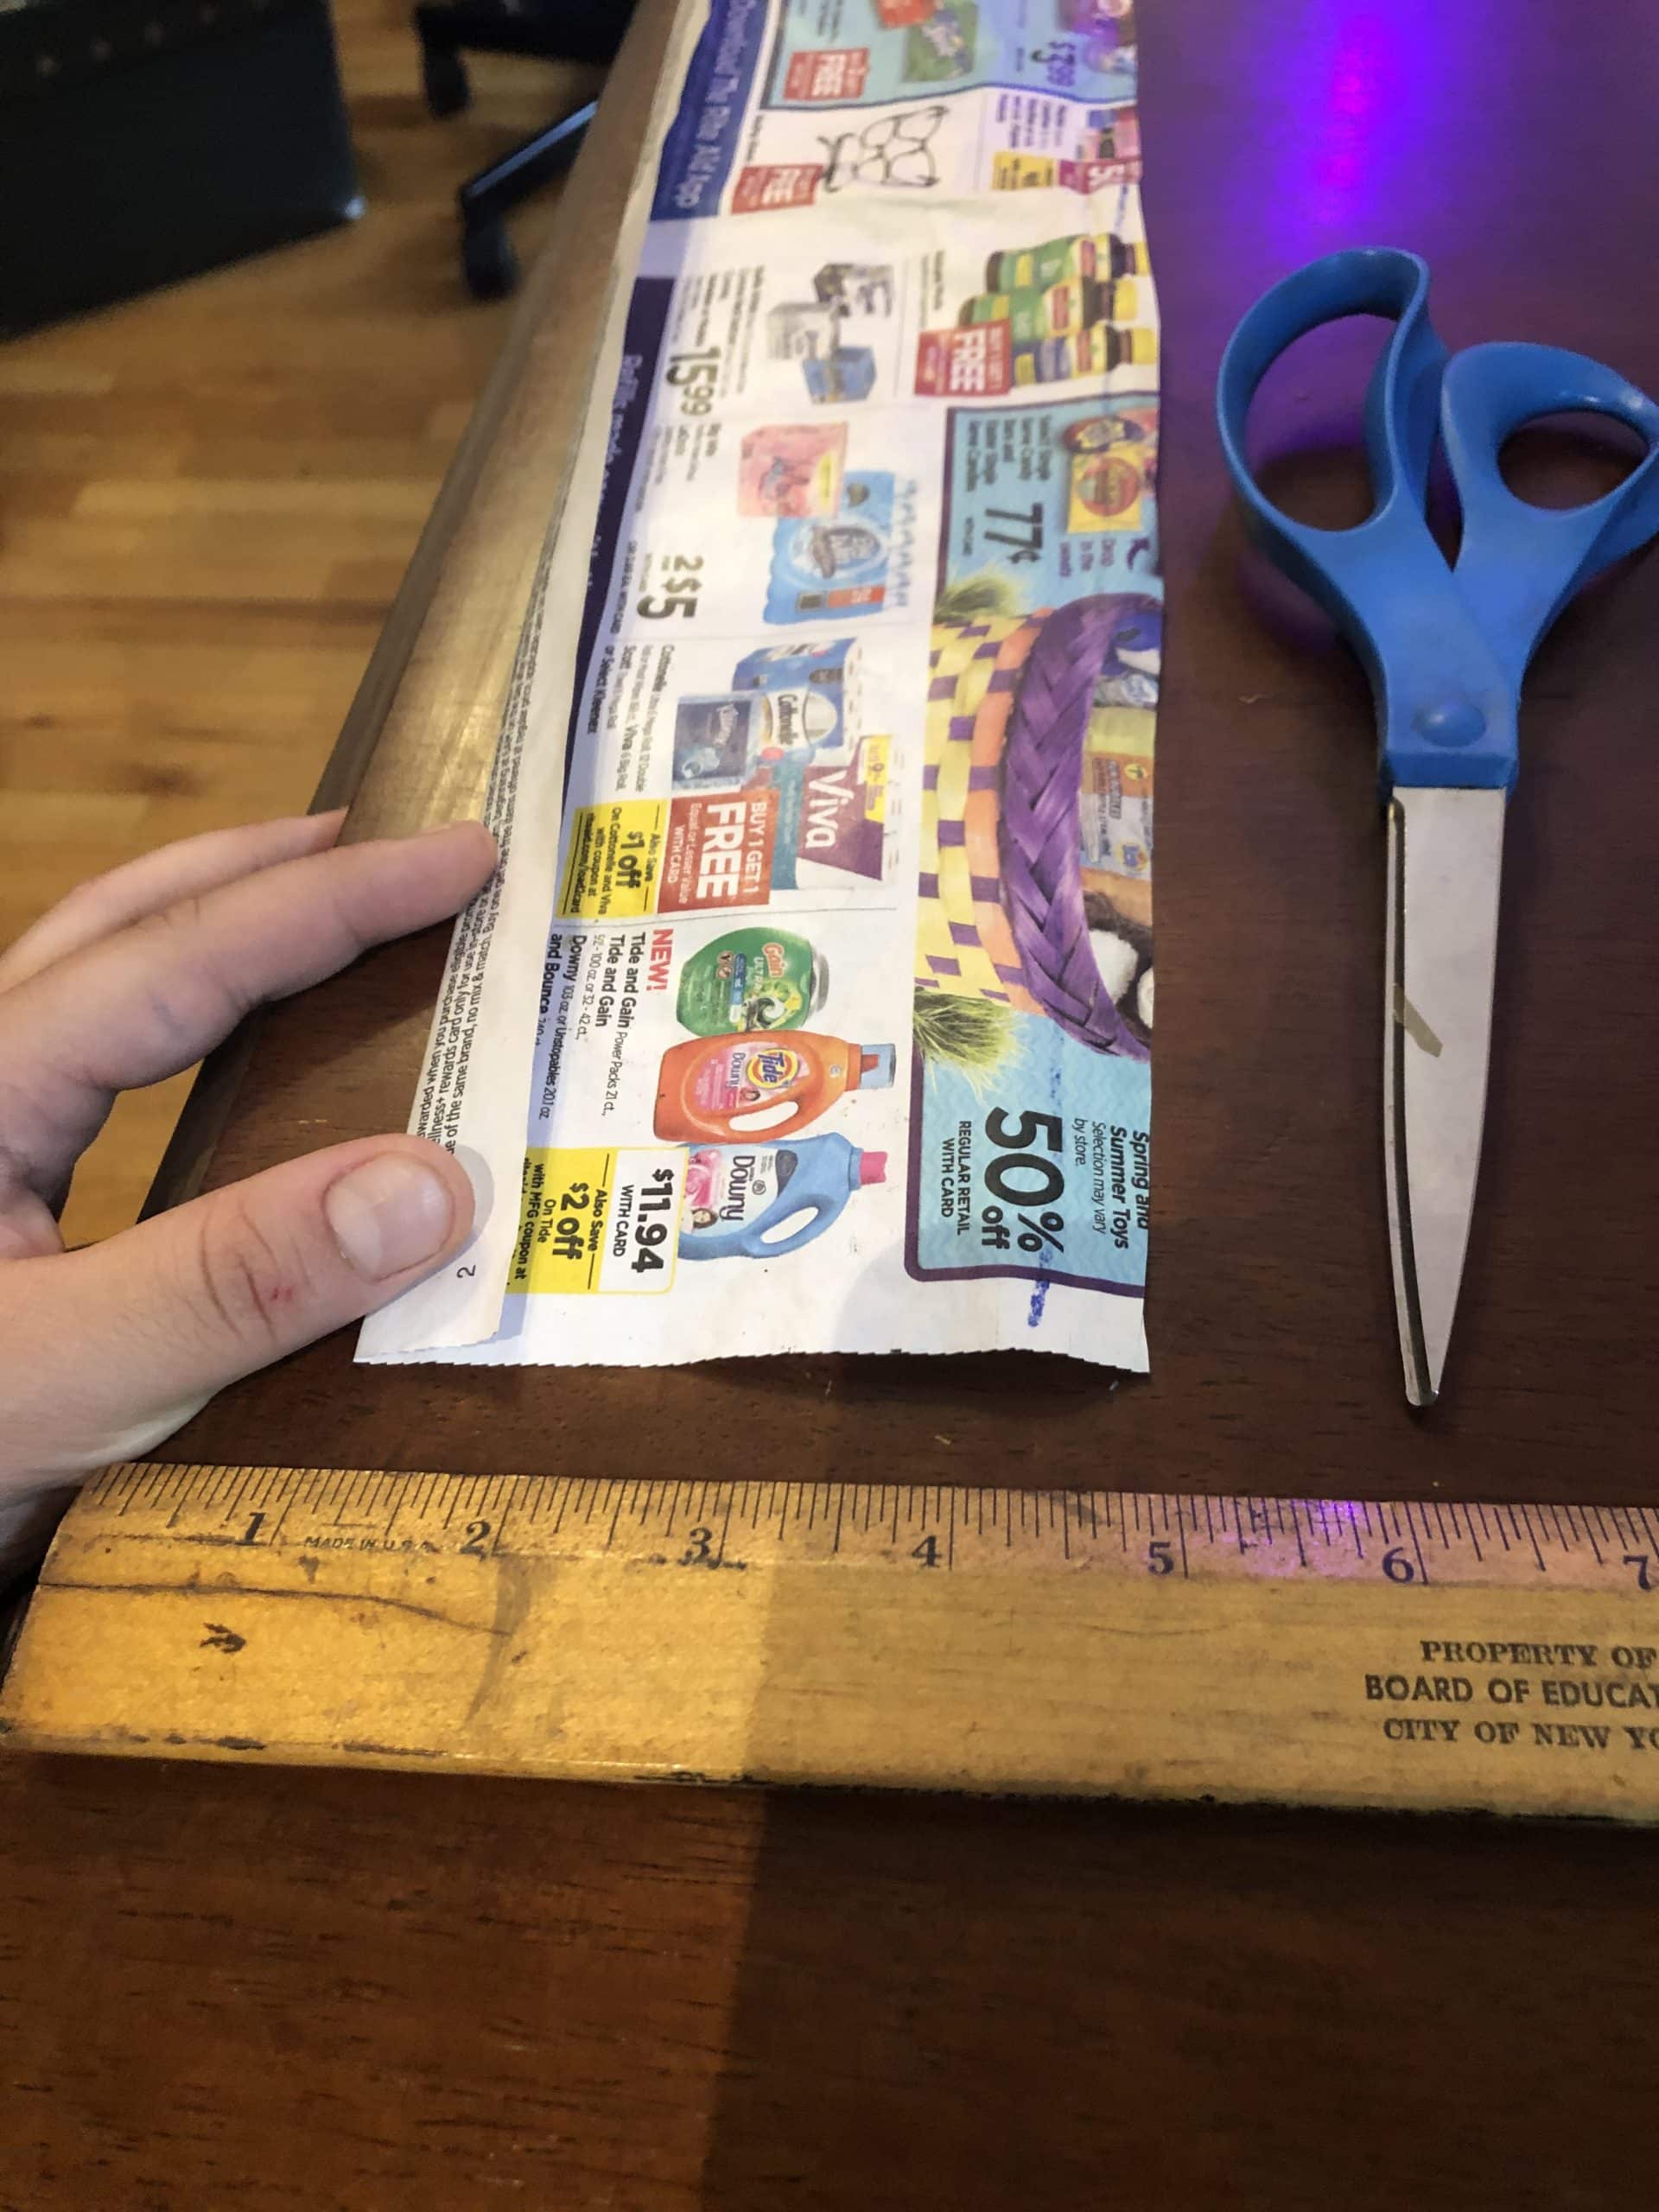
Step 3. Roll the strip tightly and completely around the sturdy cylinder leaving 1 or 2 inches of paper hanging off the edge. This will eventually form the bottom of the seed starter.
Step 4. Beginning at the seam or open flap, fold the paper in toward the middle of the cylinder, next fold the side directly opposite the seam in toward the middle of the cylinder so they overlap. It should have a puckered look.
Step 5. Fold the two remaining puckered corners in towards the middle of the cylinder like wrapping a gift.
Step 6. Firmly hold the two outer corners and gently pull the paper off the cylinder. This part can
be tricky because the paper is wrapped snuggly.
Step 7. Once the paper is off the cylinder, crease the folds so they stay in place.
Step 8. Using a scoop, trowel or your hands fill your seed starter with soil.

Step 9. Place 3-5 small seeds on the surface and push them in until they are covered with ½ inch of soil. If too many seeds are planted they will not have space to grow. If the seeds are
planted too deep they may not germinate.
Step 10. Place your planted seed starter on a small dish, gently water it and place it in a warm sunny space. Be sure not to over water or your seed starter will become a ball of mud.
Finally. Follow the instructions on your seed packet. Most seeds can be transplanted into the ground or a larger pot after about 4 weeks.
Glossary:
Cover crop: a crop grown to protect and enrich the soil. At the Lefferts Historic House we plant rye and a legume called vetch.
Till: to prepare the ground for planting. At the Lefferts Historic House we till the cover crop into the soil. This means we use a shovel to manually turn over the soil bringing soil from
underground back to the surface. This buries the cover crop completely where it will break down adding further nutrients to the soil over time creating rich soil we will bring back to the surface the next season.
Sow: to plant seeds by scattering them over the soil surface. At the Lefferts Historic House we sow flax seed for making linen cloth. This tall slender plant is filled with fiber that can be woven
into cloth as well as edible seeds.
Germinate: when a seed starts to grow and put out roots and shoots. At the Lefferts Historic House we germinate our herb and flower seeds indoors before planting in the garden.
Compostable: any material that can be used to make compost. Compost is a mixture of decayed organic matter that can be used to provide nutrients to growing plants. At the Lefferts Historic House we compost all fall leaves and garden waste. The compost we create is spread around the garden throughout the season. Check here in the future for instructions on making
your own compost at home!